Manual Configuration for a PTS-1 on Mach3
Posted:
September 13, 2021
Categories:
PTS
These instructions work well with these wiring samples:
- Connection C25XP with THC-1 and PTS-1
- Connection C94 with THC-1 and PTS-1
- Connection C82 with Thermal Dynamics Cutmaster 102
We have tested these instructions with the Ethernet Smooth Stepper and the UC300ETH but should work with any motion controller that supports probing in real-time.
We recommend that you download the standard CNC4PC Plasma configuration XML found in this download file:
https://www.cnc4pc.com/pub/media/productattachments/files/MACH3_PTS_1.zip
Used software: Mach3 Version 3.043.062 with Win 10 Fix.
STEP 1:
Start by making a backup of the existing installation:
Make a backup of the configuration and file installation, we recommend creating a backup of the current installation by right-clicking in the current installation folder and zipping it.

You can also configure it manually using these screenshots:


You will need to install the screen found in the download folder and place the macro in the macros directory for the profile folder.

You need to run the MAch3 Loader and execute for the first time the new profile you just saved and it will create the folder for storing the macros. You will then load the new m3 macro into this folder.

The new Plasma Screen and Macro will give you the ability to:
1. Set the height at which you want to start cutting or do the initial pierce.
2. Set the Pierce time. For how long do you want to pierce the material.
3. Set how low do you want to the Z-axis to go during probing or touching the plate.


As soon as the pierce time is completed, the interpreter will start executing the g-code and following the cutting path.
The M3 macro executes the following actions:
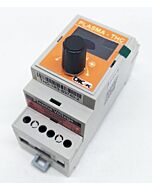
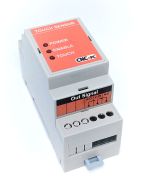
- Enables the Probing action. You should see the ENABLE LED on the PTS-1 and also on the breakout board on the LED for the pin that you wired and configured for activating the probe, and the Mach3 screen in the Probe LED. In these instructions, we are using Pin 1 on Port 2.
- The Z-axis lowers until the nozzle or sensor that you connected on the nozzle touches the plate and closes the circuit and activates the probe input. You would momentarily see action for this on the TOUCH LED on the PTS-1 unit, on the LED for the input pin you assigned on the Breakout Board and the Probe LED on the Mach3 screen.
- As soon as probing is completed, the Probe ENABLE is disabled and the z-axis moves to the Pierce position or the Pierce Height that you configured.
- The plasma starts by activating the plasma relay and stays cutting for the duration of time that you configured or set as Pierce Time in mS.
- The Plasma stays on and continues to execute g-code and THC if implemented until an M5 is reached or e-stop is pressed.
Testing and Troubleshooting Considerations:
- For the initial testing, make sure the plasma machine is off and you can observe the plasma relay activating and deactivating accordingly.
- You can observe the action for the enable, touch, and plasma on LEDs.
Related Products
0 Comment(s)