UCCNC Configuration for THC-3 on
C76 or C94
Used software: UCCNC Version 1.2115
http://www.cncdrive.com/UCCNC/setup_1.2115.exe
STEP 1: Start by making a backup of the existing installation:
Make a backup of the configuration and file installation. We recommend creating a backup of the current installation by right-clicking in the current installation folder and zipping it.
Before configuring the THC, make sure you have wired and configured, and tested the initial probing. This could be done with the Plasma Touch Sensor or a Floating Head

STEP 2: Set up Bluetooth configuration.
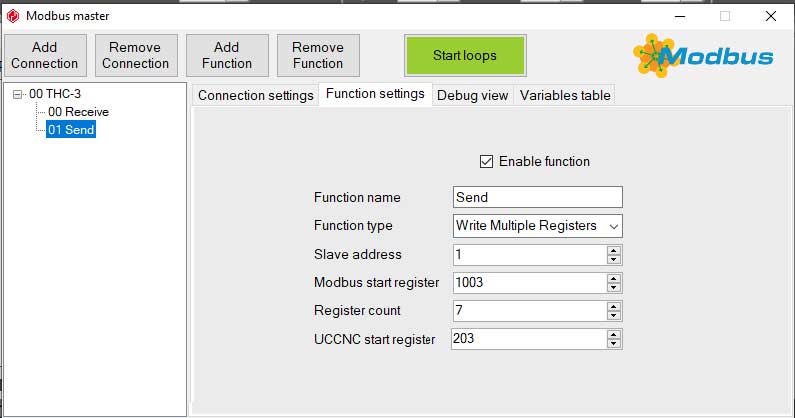
STEP 3: Modbus Configurations.
Control Panel\All Control Panel Items\Devices and Printers


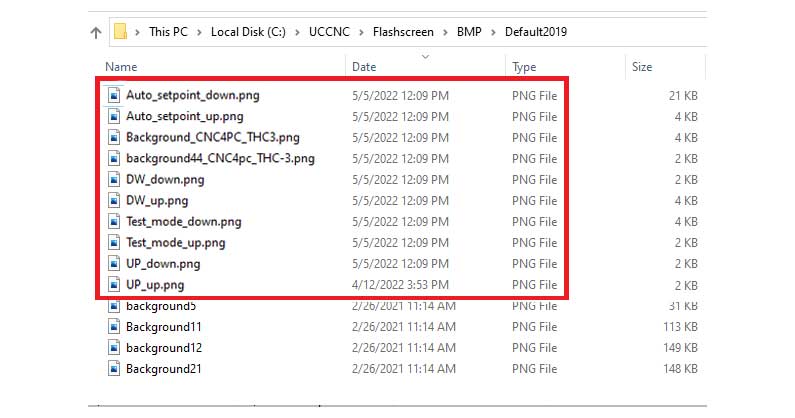
STEP 4: Download the Screen with its components and macros.
Download the compressed file containing the macros and the screen that works with the macros:
https://www.cnc4pc.com/pub/media/productattachments/files/UCCNC_THC-3_V1_2.zip
You will need to install the screen found in the download folder and place the macro in the macros directory for the profile folder.
Make a backup of the original M3 and M5 macros by zipping them into the same folder, just so you may have access to the original macros if you need to revert the installation later. Then replace the M3 and M5 macros for the profile you are configuring:

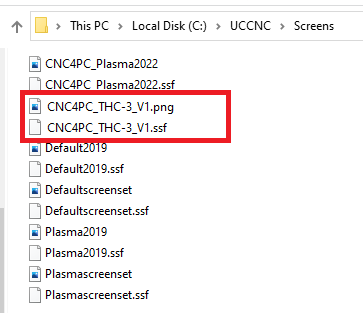
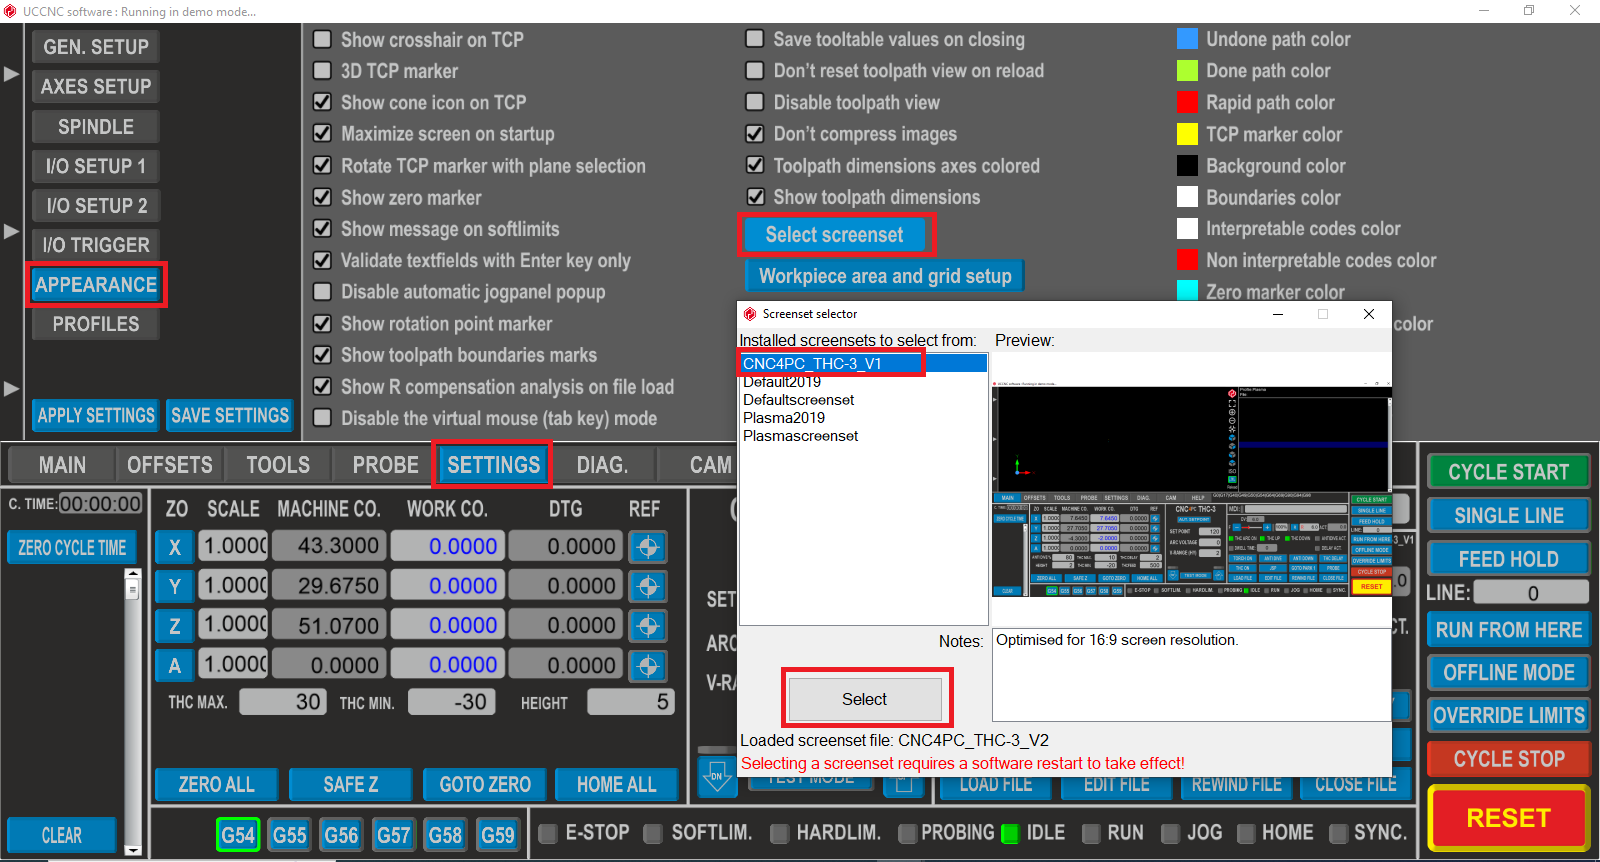
STEP 5: Configure the new Plasma Screen:
Set UCCNC to use the new screen that you just copied:
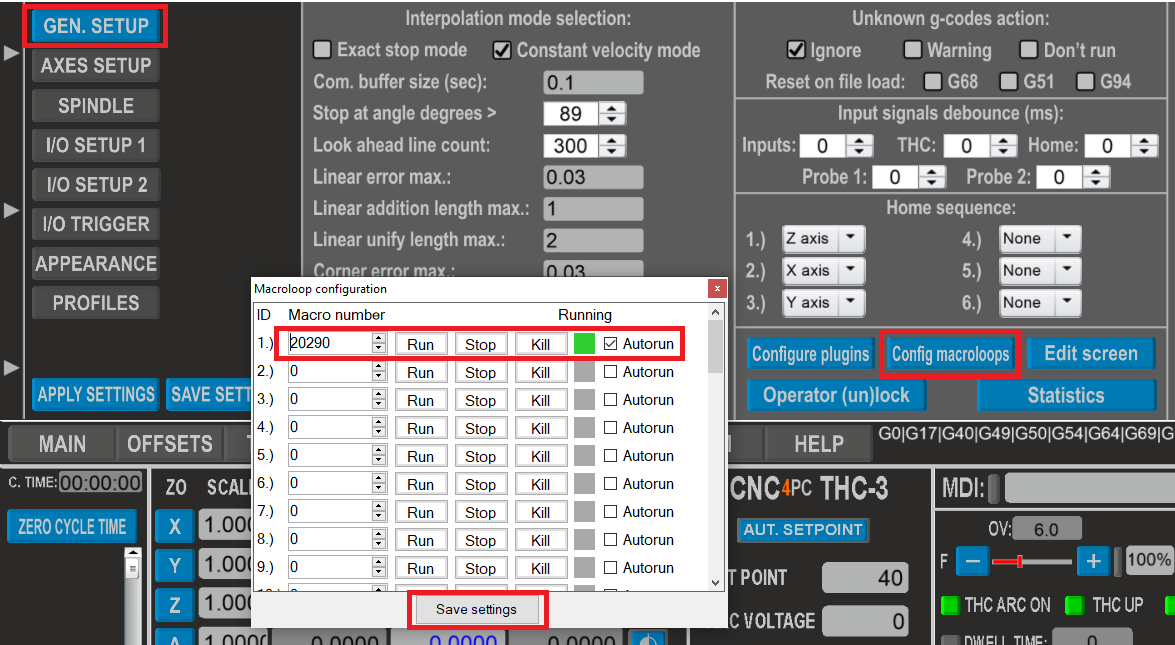
STEP 6: Configure the macroloops.
Configure the macro loop:
STEP 7: Set dwell to seconds:

STEP 8: Wiring sample
These wiring samples for connection can be used:
Connect C76 and THC-3 with Powermax 45. (cnc4pc.com)
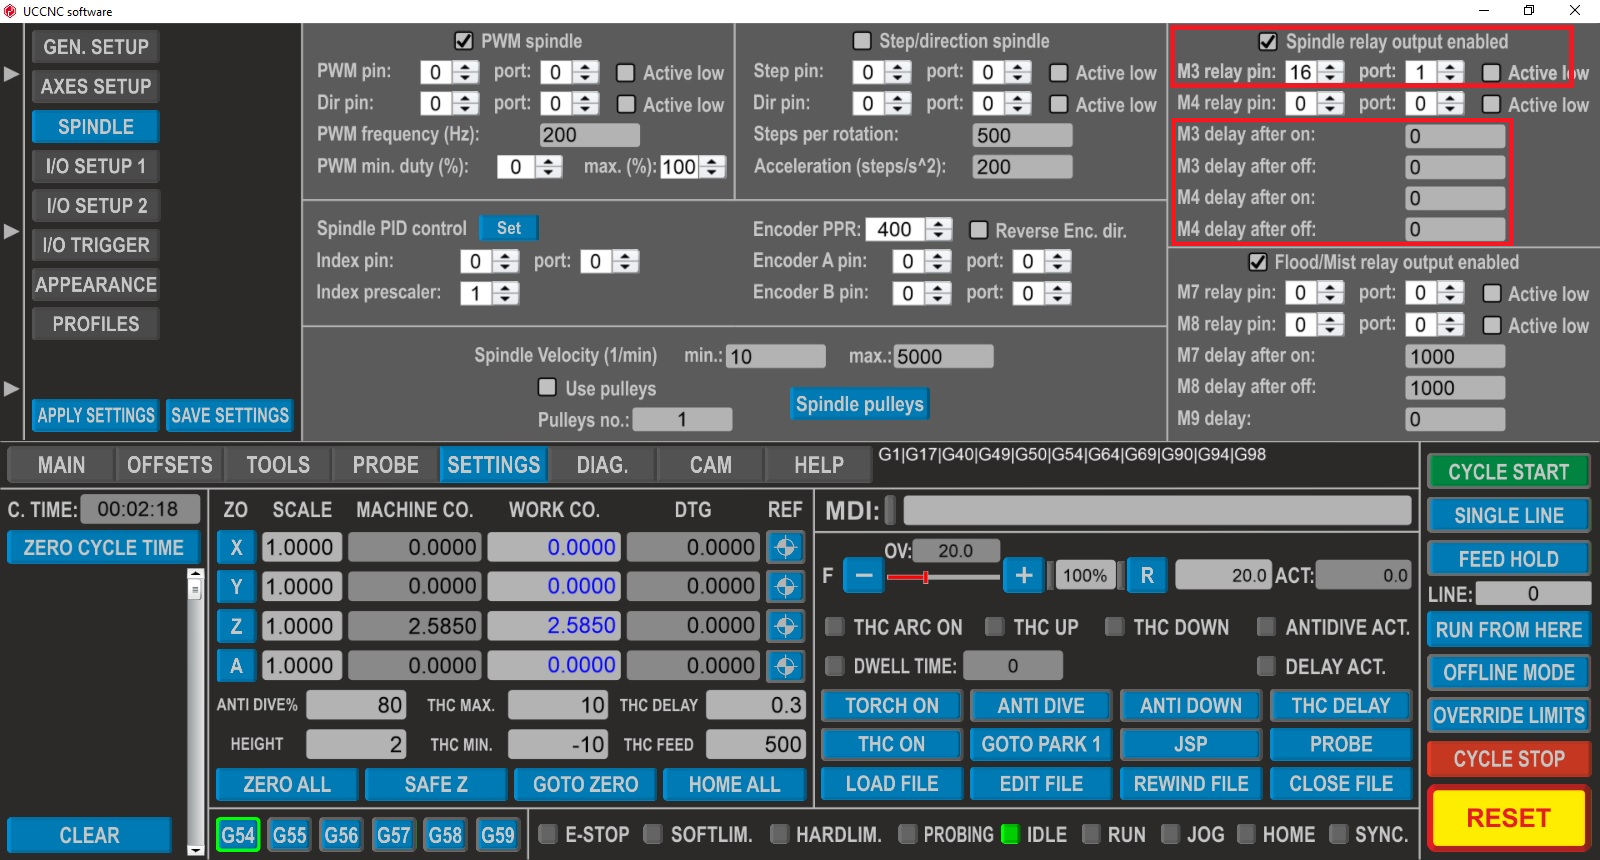
STEP 9: Configure Torch Relay.
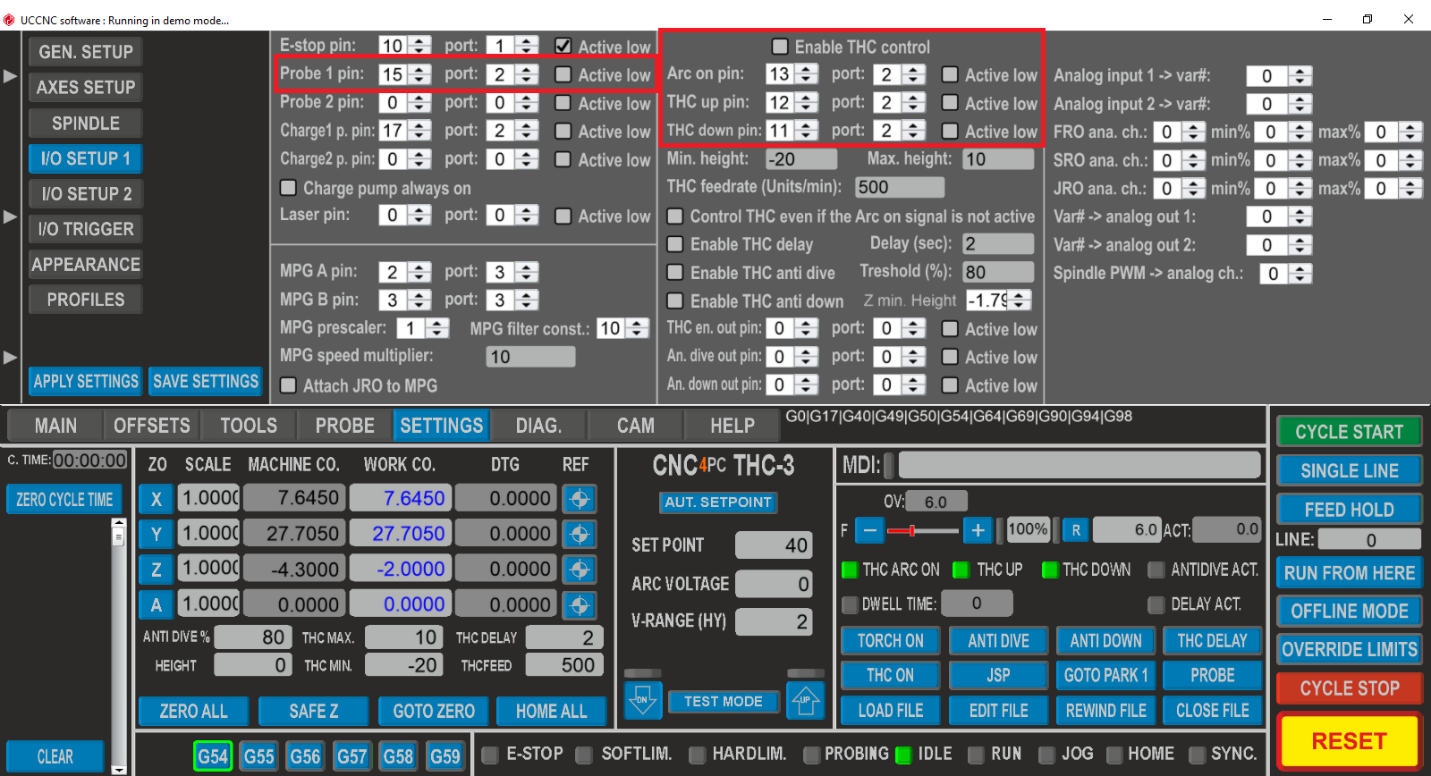
STEP 10: Configure the Probing and THC pins.
RECOMMENDATIONS:
Macro 20300
Q – Set the Height parameter
P - Set the Delay parameter (0 - 10)
H - Set the V Range parameter (0 - 32)
E - Set the Set Point (40 - 265)
Syntax:
“M20300 Q2 P2 H2 E120”
Macro 20301 (P)
1 = Auto Setpoint parameter active.
0 = Auto Setpoint parameter disabled.
Syntax:
“M20301 P1”