UCCNC Configuration and Testing of a C11G and UC100
STEP 1: Make sure the controller is connected to an USB port on the PC and powered with LEDs ON.
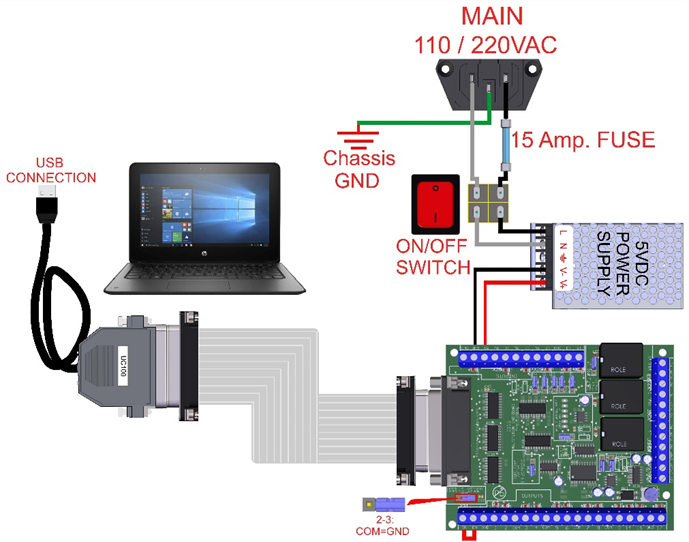
STEP 2: Instal UC100’S Driver http://cncdrive.com/MC/UC100%20files%20for%20manual%20installation/UC100_USB%20drivers.zip
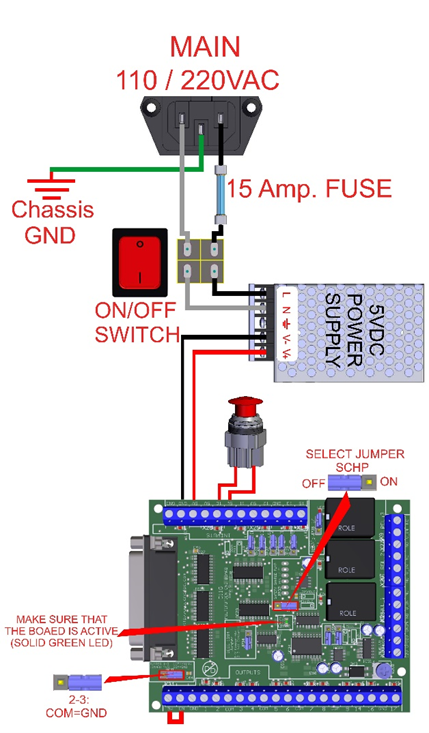
STEP 3: Connect an E-Stop button to short the E-Stop terminals, disable the Safety Change Pump (OFF). This should give you a green LED. IF not, check other possible fault conditions and make sure they are not active.
STEP 4: Download the cnc4pc.com software and run it as follows for its operation.
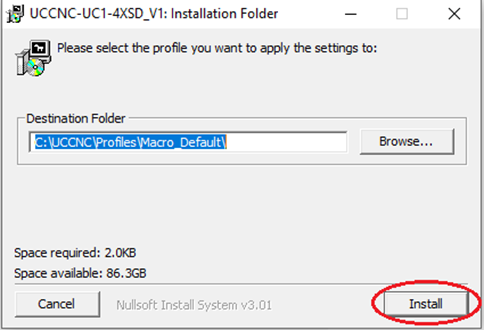
- Select the profile of your preference> click on install.

- finally click on finish.
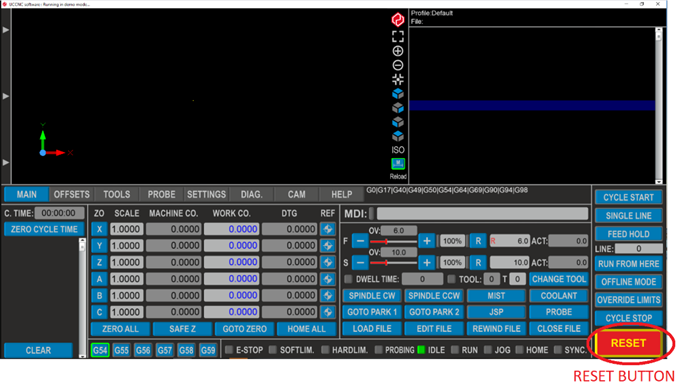
STEP 5: Start UCCNC. Must light the green LED, when you press the reset button and you can proceed to set the travel info for the axes and set up the max spindle speed for the spindle.
STEP 6: Test the E-Stop by opening the circuit a confirming the green LED goes off. You can now enable back on the SCHP by moving (ON) so it will be the control software what will enable the system. The Safety Charge Pump can be activated or deactivated depending on the jumper position.

7. If something is not clear, do not hesitate in opening a support ticket and we will get back to you as soon as possible: https://cnc4pc.com/contact/