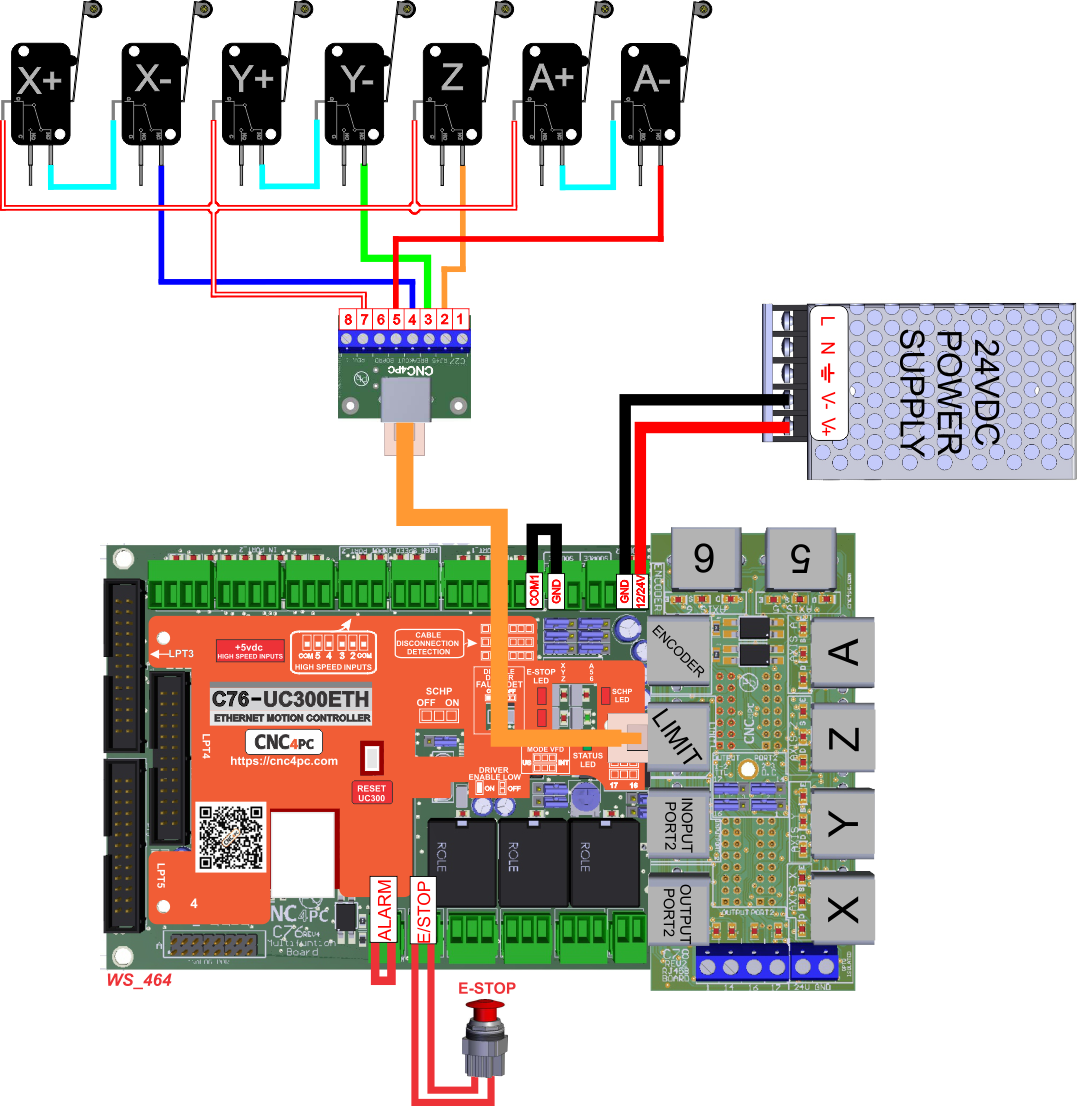
Connecting the C76 with the Mechanical Limits Switch and C27
General Recommendations on Setting up Home/Limit Switches:
- Note that the Limit function is disabled while homing, so it is smart to use the same switches for homing and limits. It is also good practice to map positive and negative signals to the same input, because the control software only cares which axis the signal comes from; it knows the direction the axis is moving.
- Test with just one Switch. Once the switch is set up and complete, proceed to the other switches; they should follow the same process.
- When you wire the switch, test it and watch for an LED indicator on the breakout board. Also, use the Diagnostics Screen to verify that the Motion Controller/Control Software is responding to the input signal.
- Enable Homing and disable Limits for the axis you wired, and test homing. You may need to invert the active High/low state of the input signal. Depending on how you define the table and the switch location, you may need to apply an offset to ensure Machine Zero is positioned at the table location you want.
- Once Homing for the axis worked OK, enable the limits and test them. If, when you enable them, you immediately see a limit error on the screen, then you need to invert the active-high/active-low of that signal.
- Finally, it is good practice to enable and configure the Softlimits. These will be active after homing the machine. By knowing the limit switches' positions, the machine can slow down as it approaches the limits and will warn you, preventing a crash.