
Eding CNC760 installation for a paired Y-axis Gantry machine
This system was purchased to integrate into an Avid CNC 4-foot gantry router, while allowing for ATC function and also screw compensation. The original control system was retired due to a lack of features. The next control system was found to be dysfunctional, and Eding was my third installation on the machine. It has been successful. This page serves as a review of the CNC760 control board.
Documentation:
I found their documentation to be clear and free of contradictions or old version content. You have the “Full manual” and also the “Support → Online documentation” side of their website. That one allows keyword searching for things that have been asked before. In comparison to the two CNC control systems I set up before, this is superior. When I asked Eding one setup question, their answer arrived one day later.
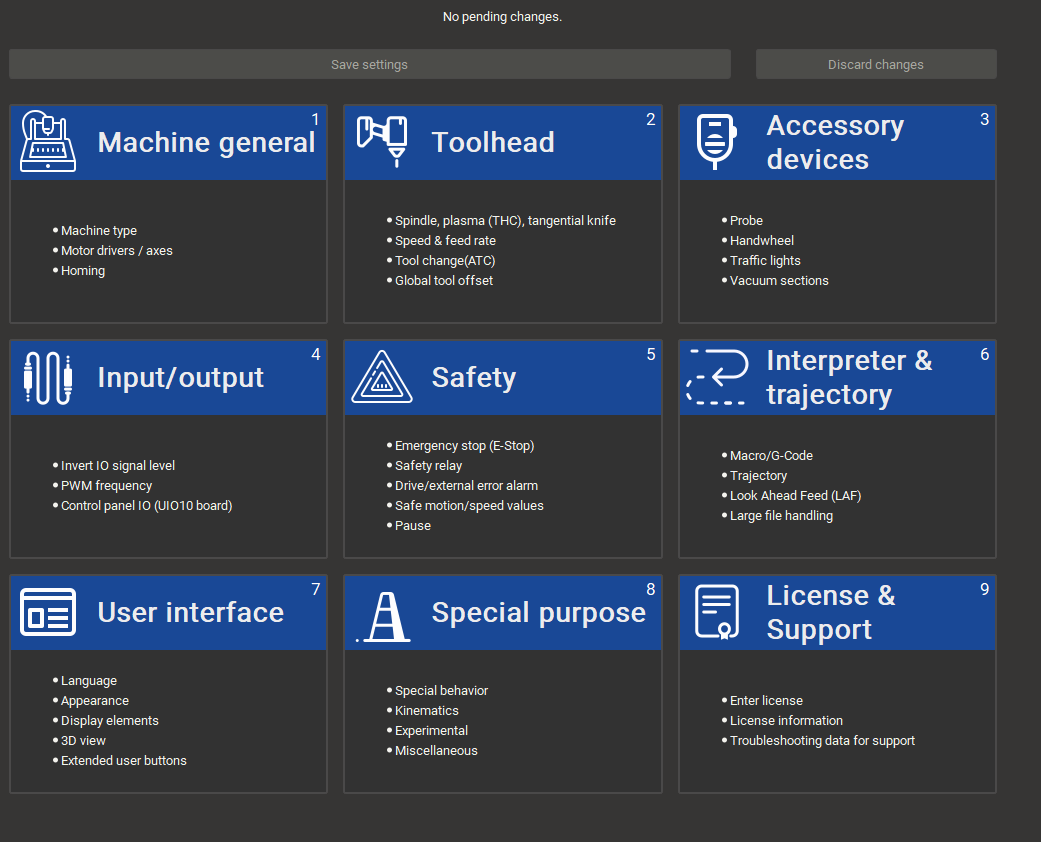
Below are some setup screenshots, this just gives an intro.
 |
 |
|
Fig 1. Main setup page |
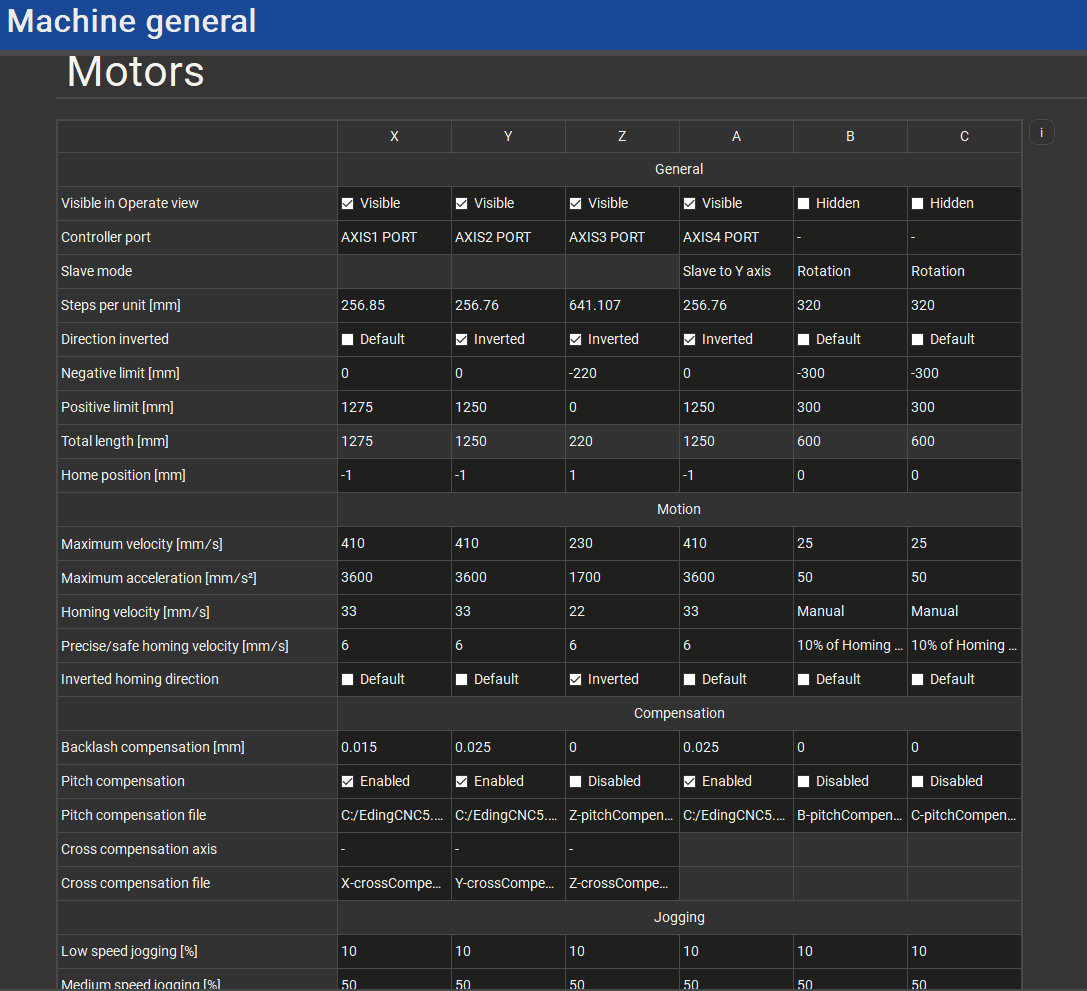
Fig 2. Machine general page |
 |
 |
|
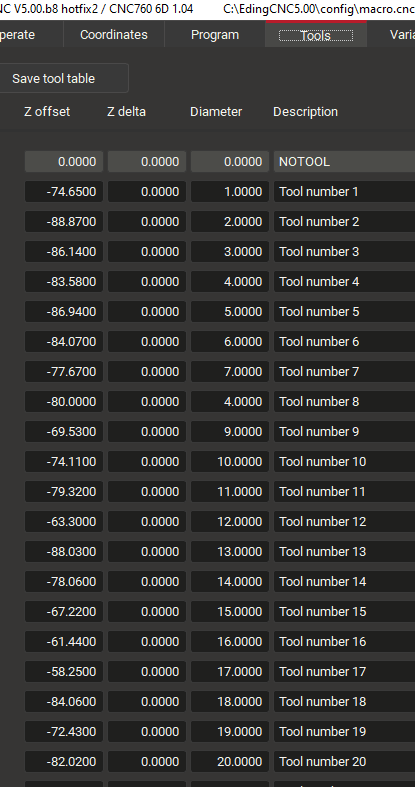
Fig 3. Tool list |
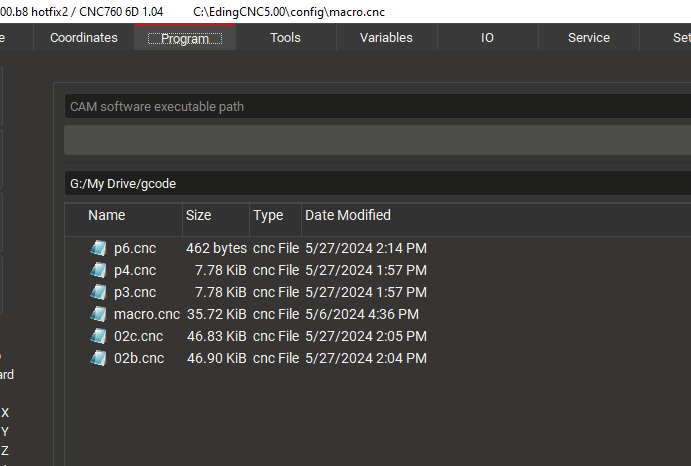
Fig 4. Program: I place Gcode files in google drive, they automatically feed here for retrieval and use. Ignore that macro.cnc is found in the pic, that is not intentional or desired. |
 |
|
|
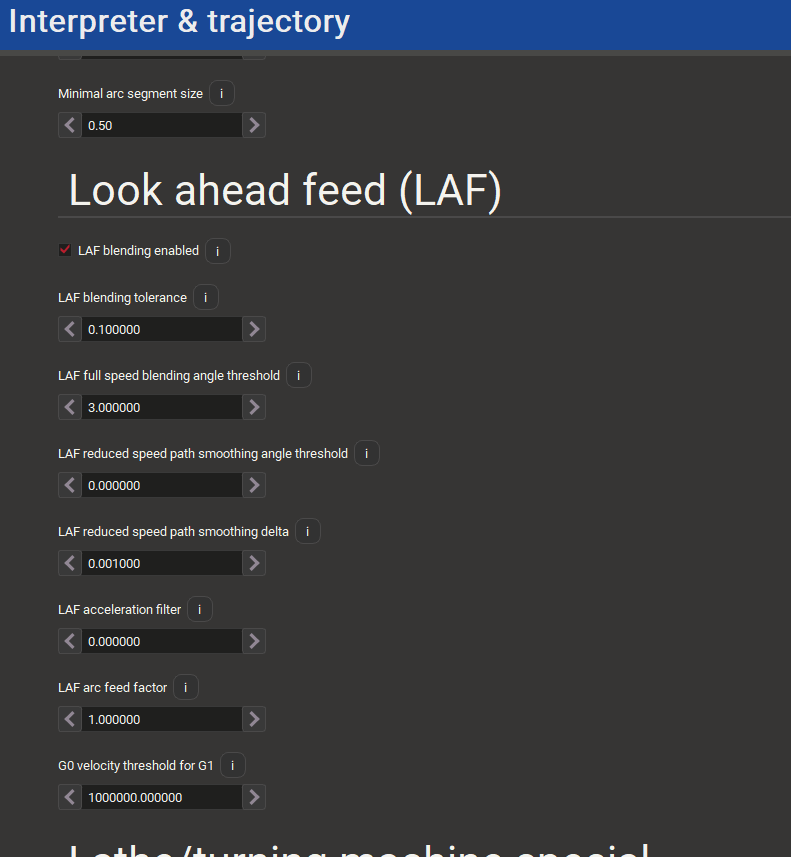
Fig 5. LAF functions, I left them stock; I have not gone further. |
|
ATC function:
Eding offers a “Kress toolchanger” macro, which is a start to write your own. That is the basis from which I wrote my 20-pocket ATC macro. I used variables that I assigned to control time delays and speeds. I can fine-tune the speeds centrally without changing each of the 20 positions. The tool changes are currently running 6 seconds from one tool to the next. If transiting from a vice, etc., it may be 8 seconds. I can speed that up a lot, with some inherent risks or machine wear, 8 seconds is fine for me. I run a braking resistor on the spindle, which is set to stop in 2s to work within ATC timing.
Each tool-change calls a tool height from a table within the Eding program, I manually derive the heights with a Z offset tool once, or when I replace a tool.
|
sub change_tool ; Switch off guard for tool change area collision TCAGuard off #29 = 24000 ;speed to approach ATC #30 = 14000 ;speed to drop Z #31 = 14000 ;speed to rise Z #32 = -50 ; Z height between toolchanges when empty #33 = 0.8 ; collet open delay #34 = 1.2 ; collet close delay
|
 |
|
Fig 6. The variables I use in the macro to define speeds, delays |
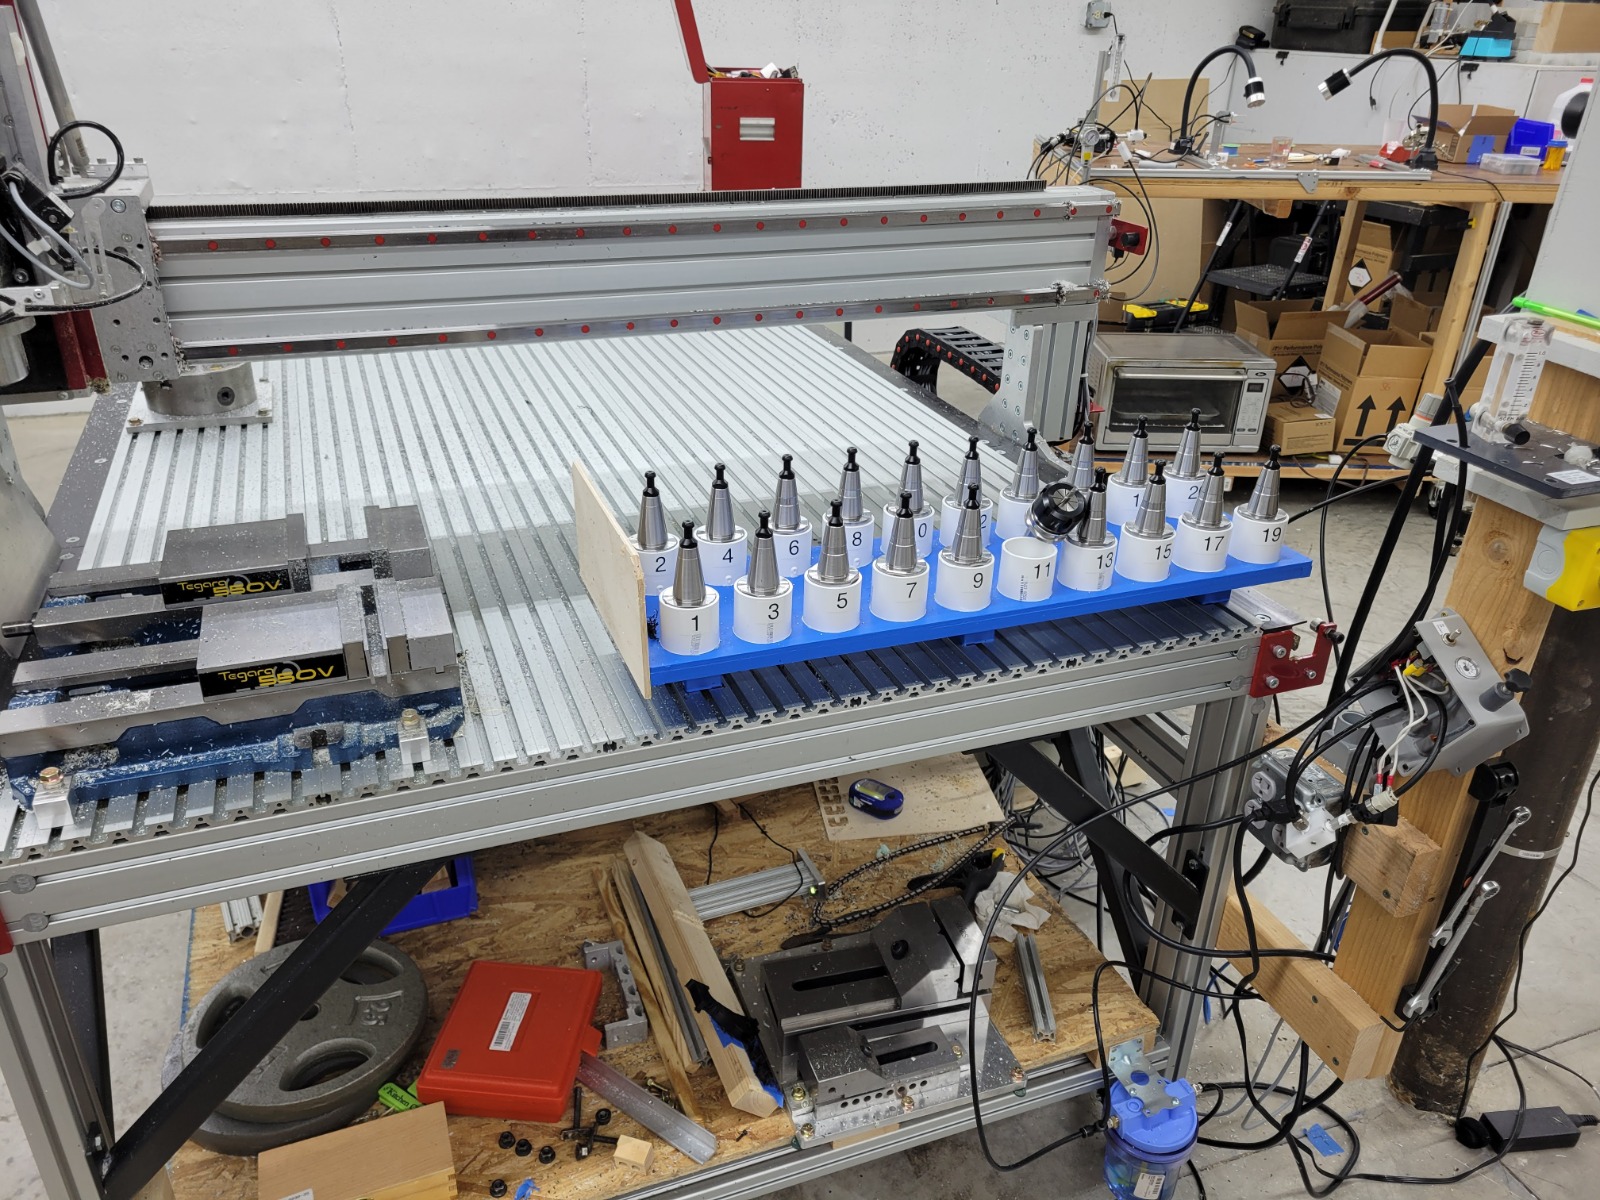
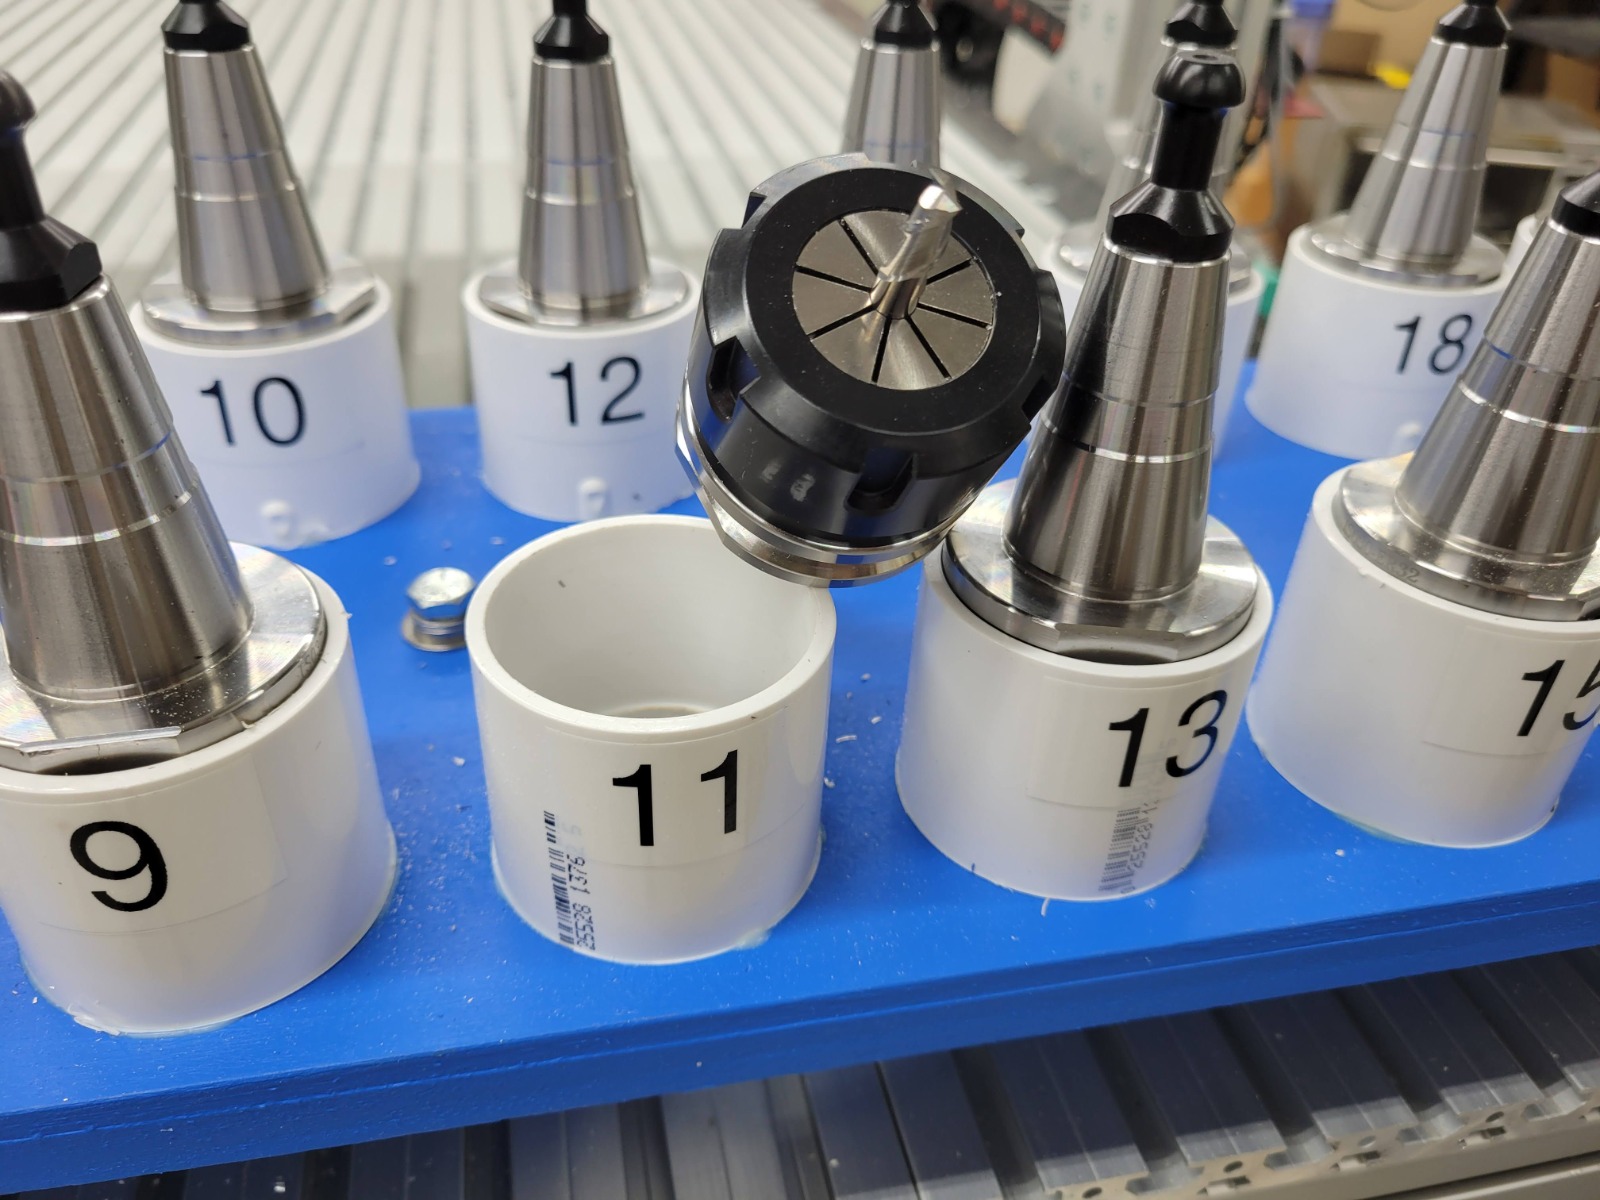
Fig 7. ATC rack |
 |
|
|
Fig 8. ATC rack: These are PVC plumbing fittings (Mcmaster #) 4880k75, with slight milling to fit ER30 toolholders, they are bonded into 6mm plywood. |
|
Screw compensation, precision:
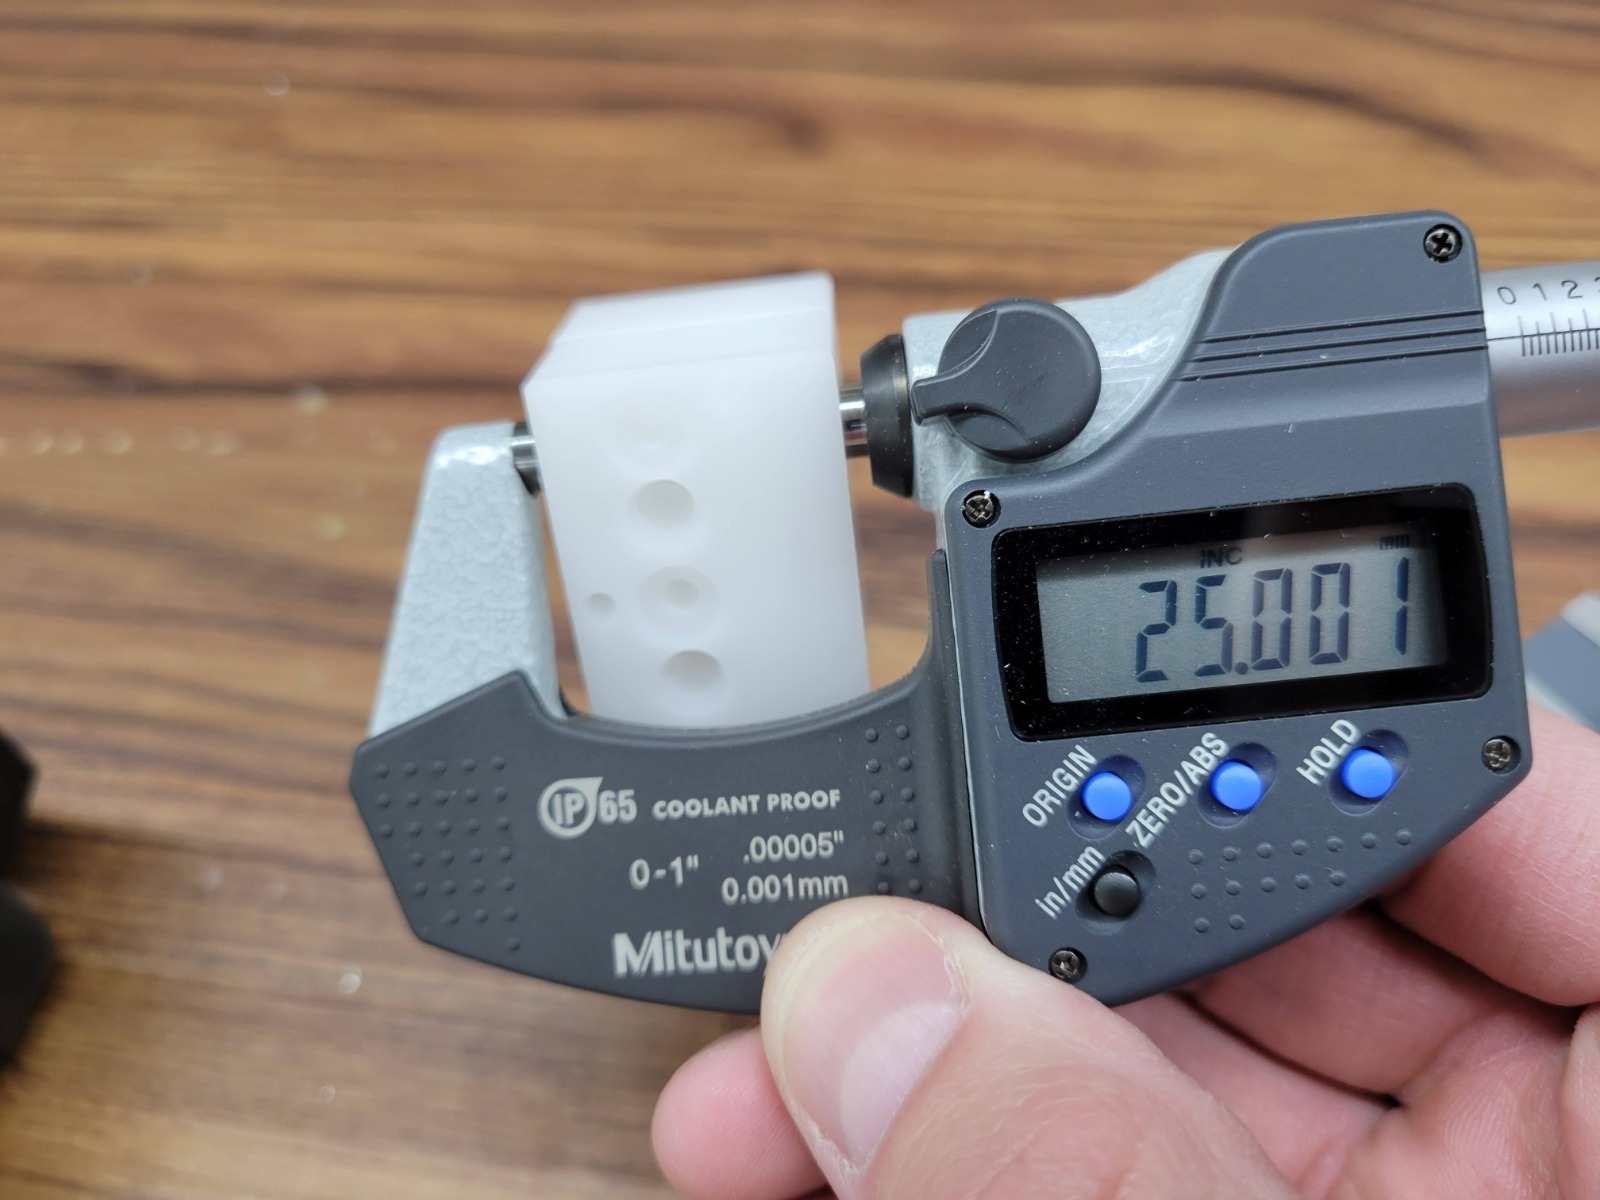
Screw compensation of each servo has been particularly useful. While machining moderately sized parts to +-70 microns was common previously, the Eding control is now achieving +-35 microns. Repeatability is about 15 microns. These figures are not that impressive in light of VMC performance, but when considered as the product of an inexpensive gantry router with a 4-foot span, they are. The Eding system also has backlash compensation, of which I apply a small correction after calibrating the screw positions.
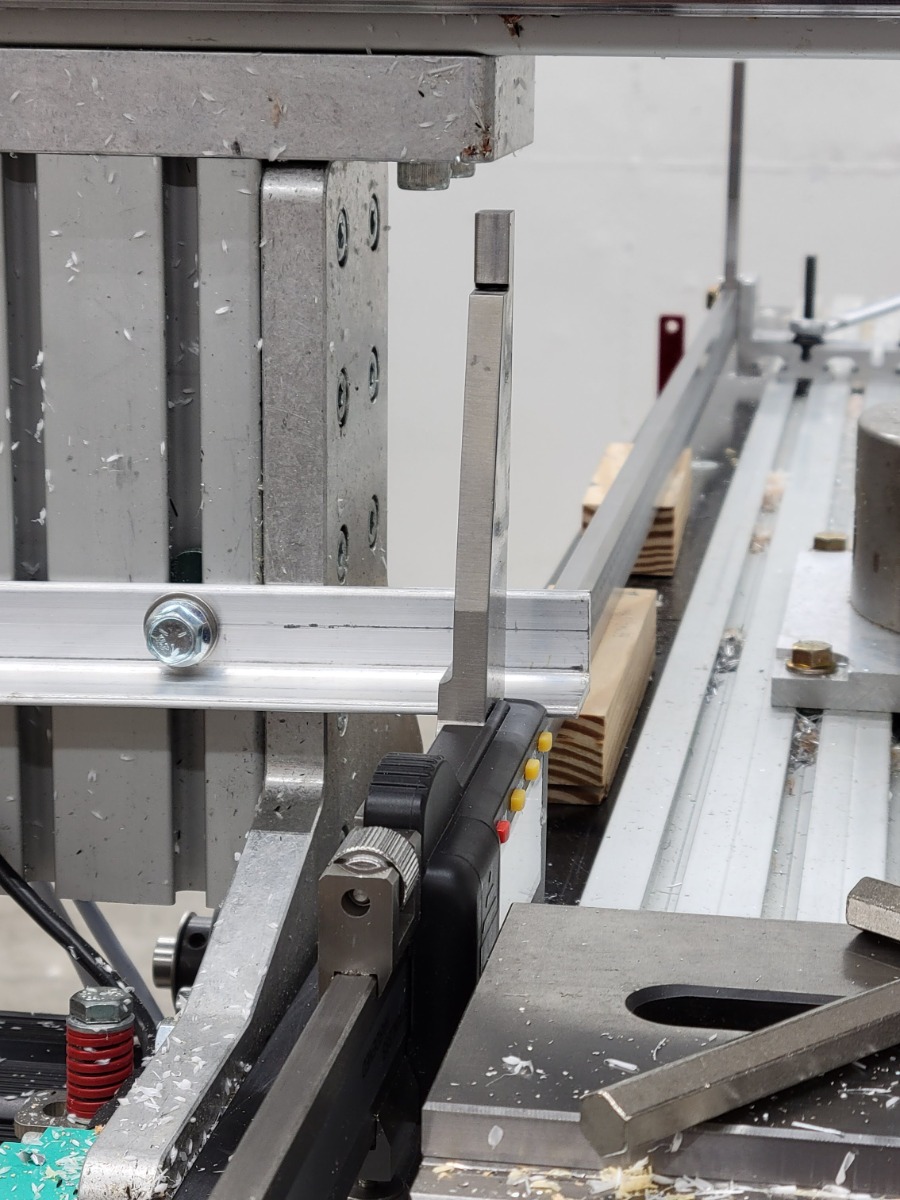
My screw compensation system is a 1-meter caliper from Shars, led by a dowel in a tool holder.
 |
 |
|
Fig 9. Screw compensation on each side of Y, large caliper driven by the gantry. |
Fig 10. You get lucky sometimes. |
Machine dynamics:
The machine allows for max speed and acceleration to be set for each axis, Fig 2. above, they also use “Look ahead feed.” I have not adjusted LAF, but the dynamics of the machine are refined at high acceleration maneuvers. My machining involves a lot of trochoidal HSM toolpaths, which work out wellwith w/Eding. This is not exactly the case with every CNC control.
Rapids:
Eding does not offer a reduction of rapids in the control. When running single jobs, I usually like to turn this down a lot, just in case I can intercept a crash before it happens. Alternatively, one can write the G-code to have a slow plunge or lead-in, in some cases.
Speed:
Booting is 14 seconds from flipping the switch on (and initiating the program) to be operational, and homing is 9 seconds, including the gantry squaring ritual. I have had one experience with a competing system that had a 55-second homing sequence.
Bugs and software/hardware integration:
Eding has not manifested buggy behavior, i.e. periodic dysfunctions. Editing is the hardware and software. They charge for the hardware, and you can use the software in demo mode before purchase. These factors are valuable to ending up with a reliable system and not having downtime diagnosing a new setup.
Pendant:
The pendant is a Chinese unit used by many CNC control systems. These devices are sold for a given brand, and a few buttons are different. The pendant function is convenient, wireless, and of reasonable quality.
Enclosure, wiring:
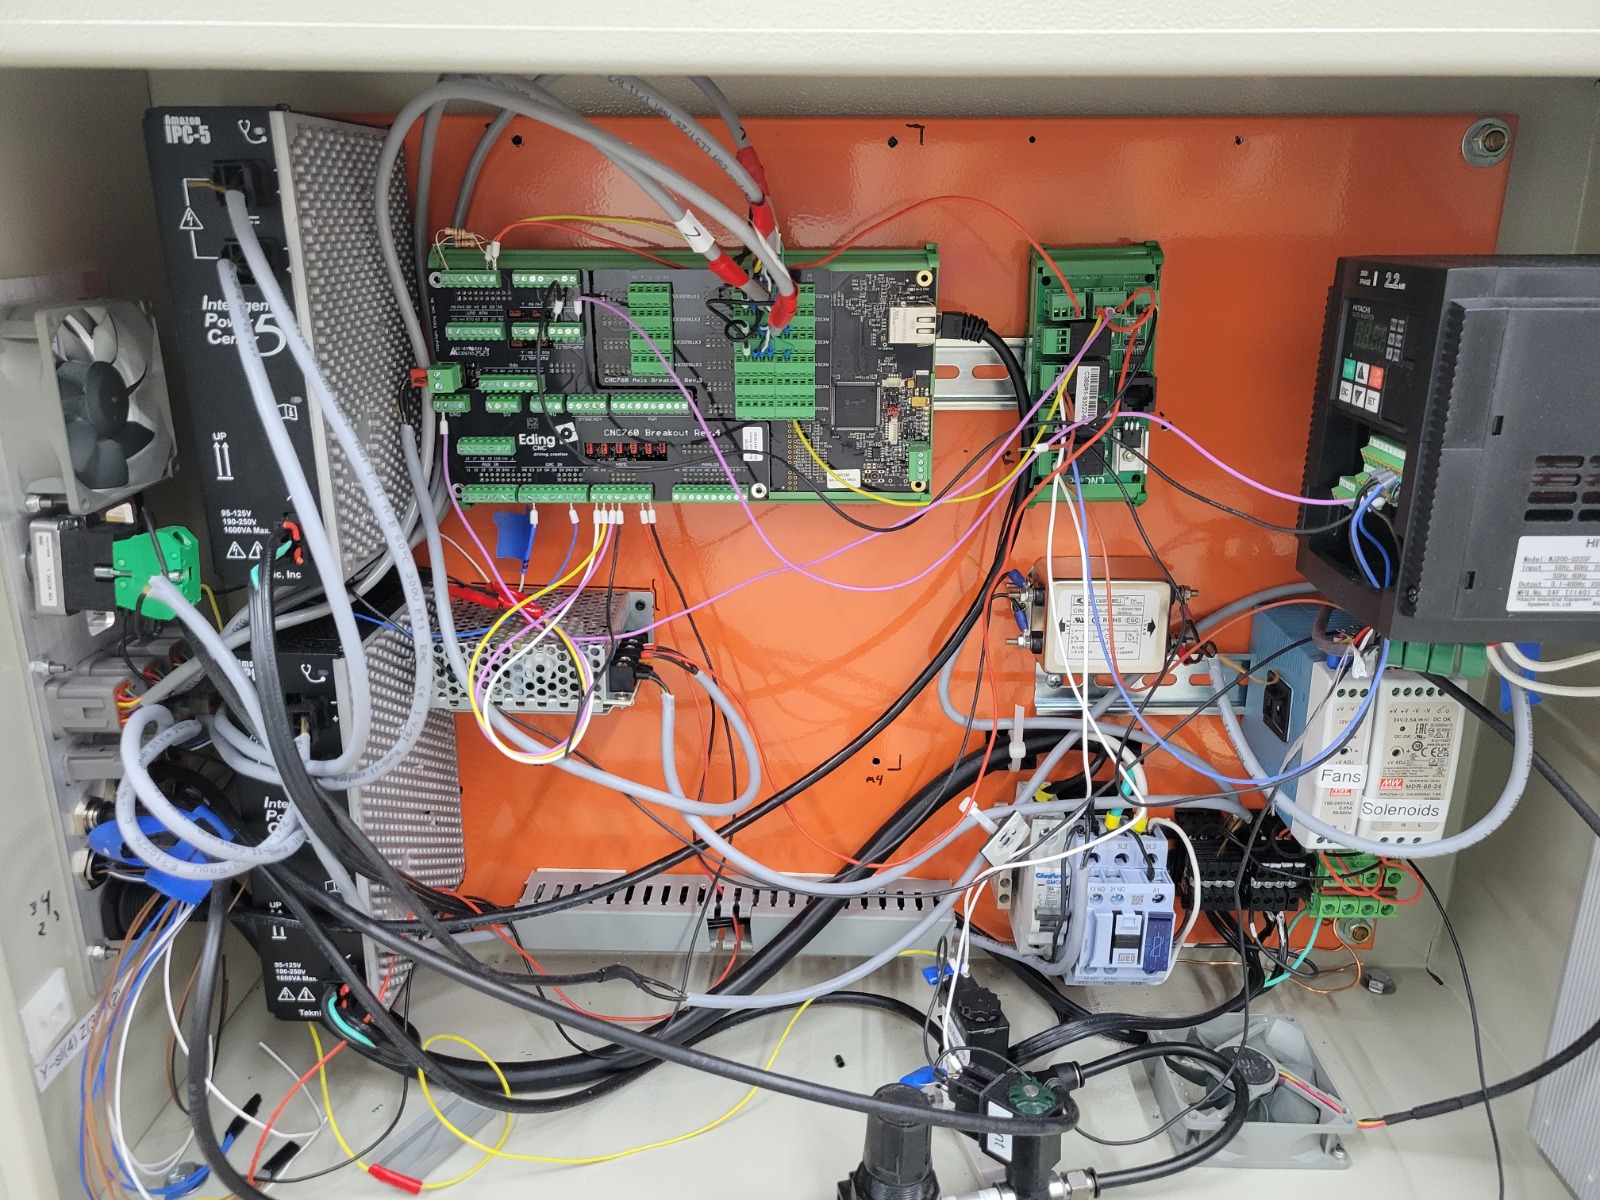
I have it in an enclosure from CNC4PC, https://www.cnc4pc.com/shop/bx8-bx8-700-x-500-x-250-mm-enclosure-box-with-side-panel-1484
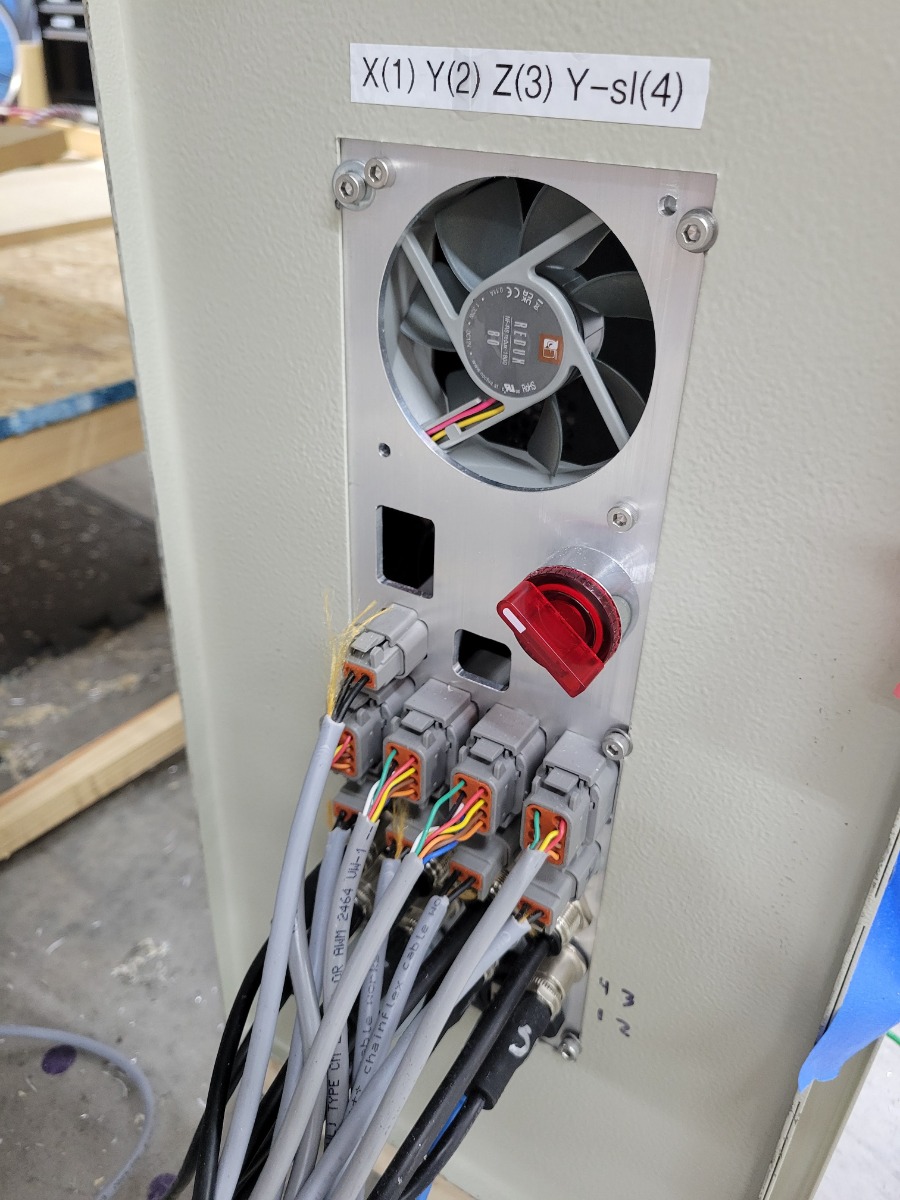
I milled out an aluminum plate with all of the I-O. The connectors I used are primarily Deutsch connectors. They are of high quality. Molex makes many connectors, which would be OK and cheap/simple as well. My entire machine is fed off of 240V 1 phase, with an appropriate contactor, power supplies to feed this board, plus other things.
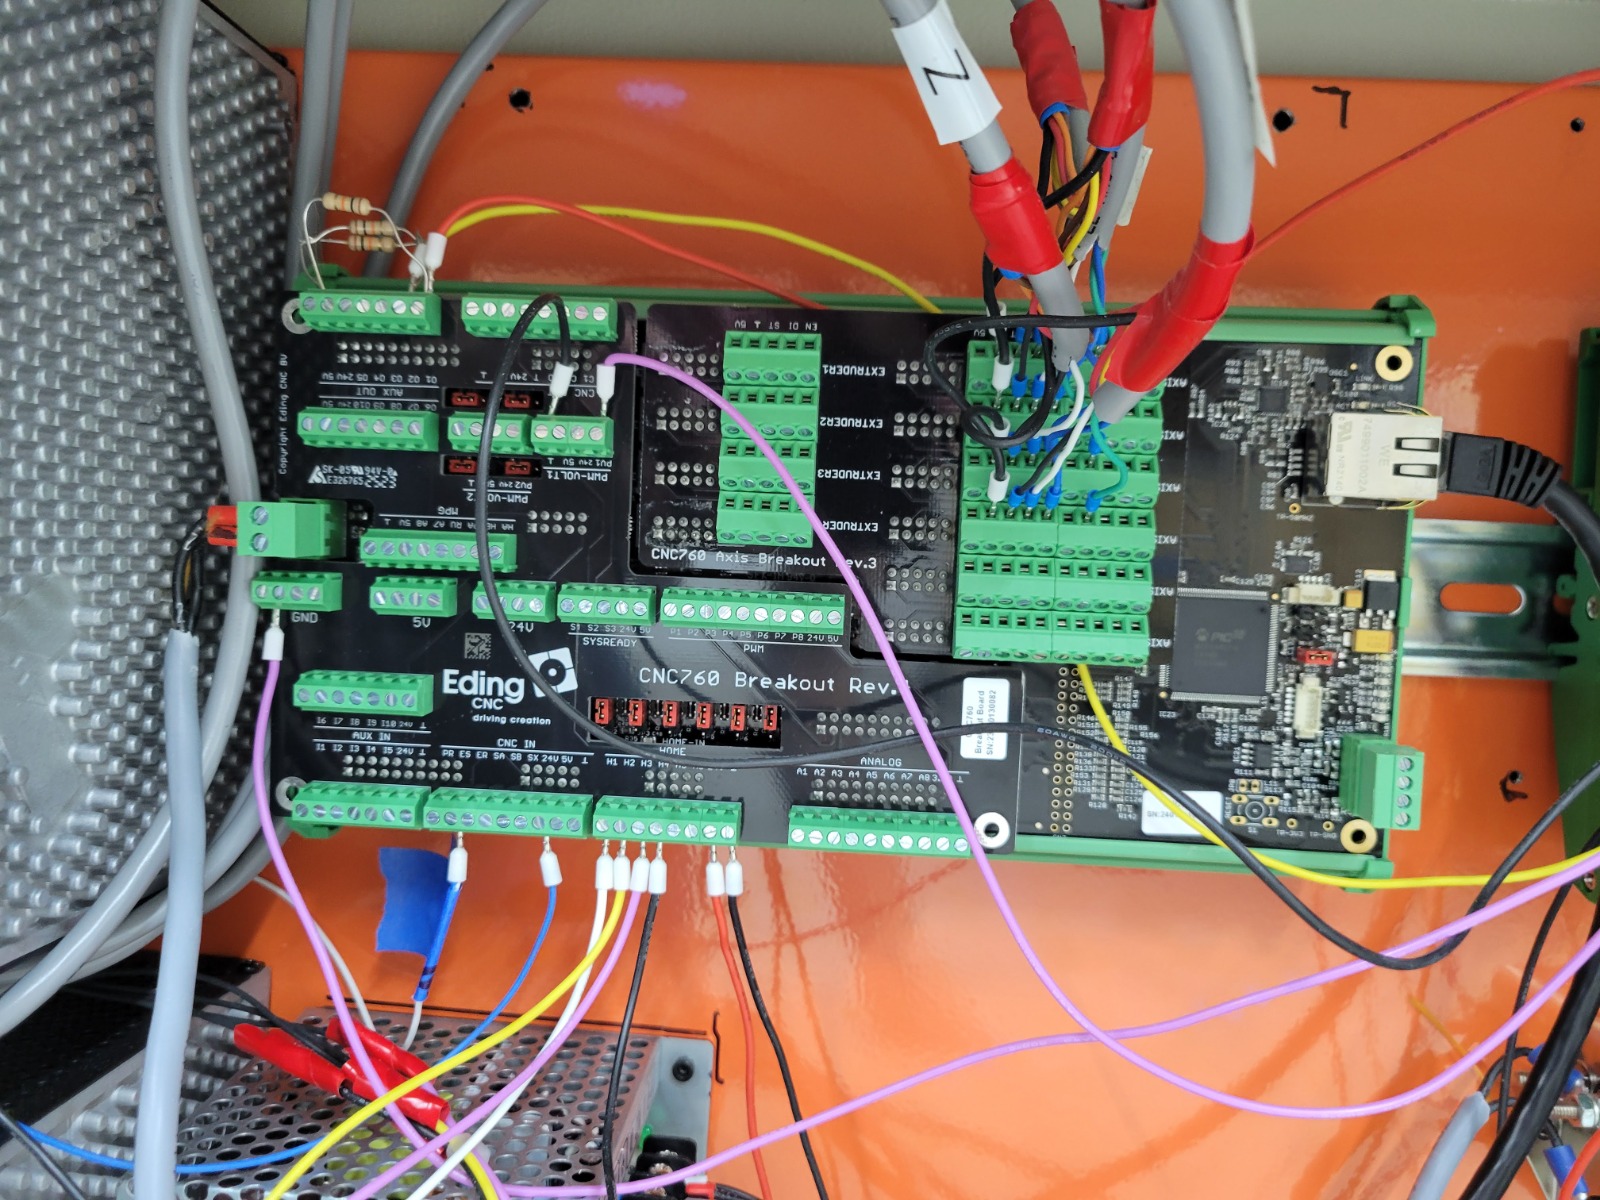
I have had no electromagnetic interference issues with Eding; wiring is rather easy with the screw terminal engagements on their breakout board. The sinking resistors on the homing switches are needed, see top left of Fig 3. and were a new concept for me.
 |
 |
|
Fig 3. Enclosure |
Fig 4. |
 |
|
|
Fig 5. Deutsche connectors epoxied into bores. ⅛” aluminum plate. |
|
My macro for ATC is below.