Configuration and Testing of a C25XP with Mach4 Ver. 5
The main objectives of these step-by-step instructions are:
- Power the C25XP board and connect the emergency stop (e-stop) button. Then, test that the board activates and deactivates at the hardware level only with the e-stop.
- Establish communication with the ESS and install the C25XP configuration.
- Enable and configure the Safety Charge Pump to ensure the C25XP activates (green LED) when MACH4 becomes active (out of reset).
Used software: Mach4 4.2.0.5920.
https://www.machsupport.com/ftp/Mach4/DevlopmentVersions/Mach4Hobby_Installer-4.2.0.5920.exe
Used hardware: C25XP-R5.1 and ESS
https://warp9td.com/files/Plugins/ESS/Mach4/ESS_Mach4_v320.zip
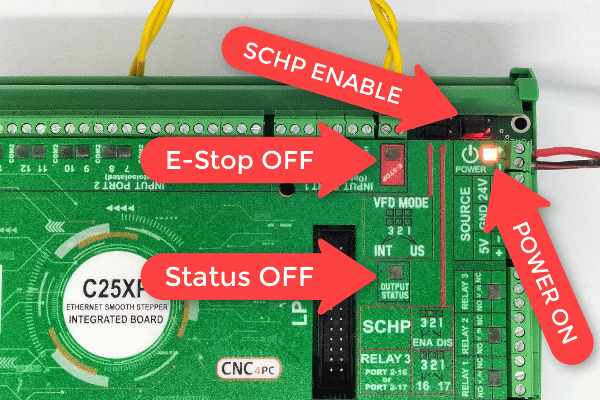
Step 1: Connect an E-Stop button to short the E-Stop terminals.
- This should give you a green LED while the board is powered, and the e-stop is closed.
- If not, check other possible fault conditions and make sure they are not active.
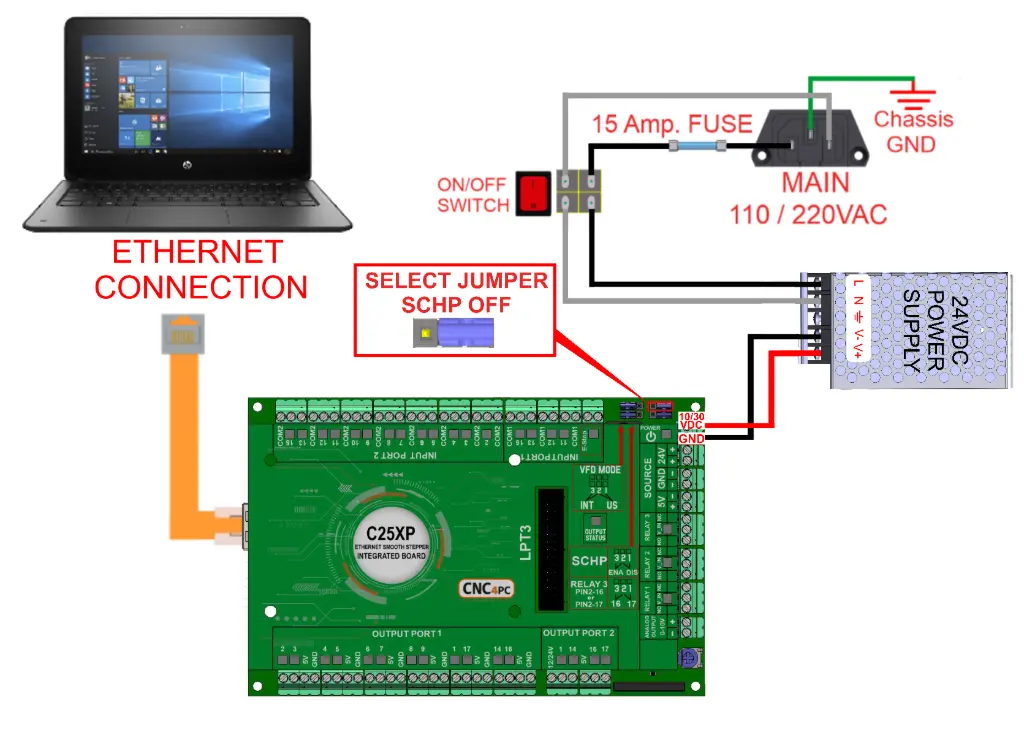
Step 2: Make sure the controller is connected to an Ethernet port on the PC and powered with LEDs ON.
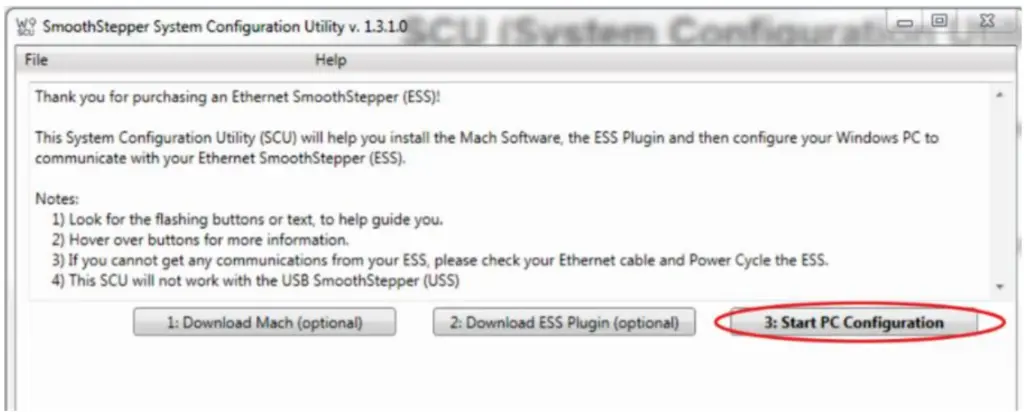
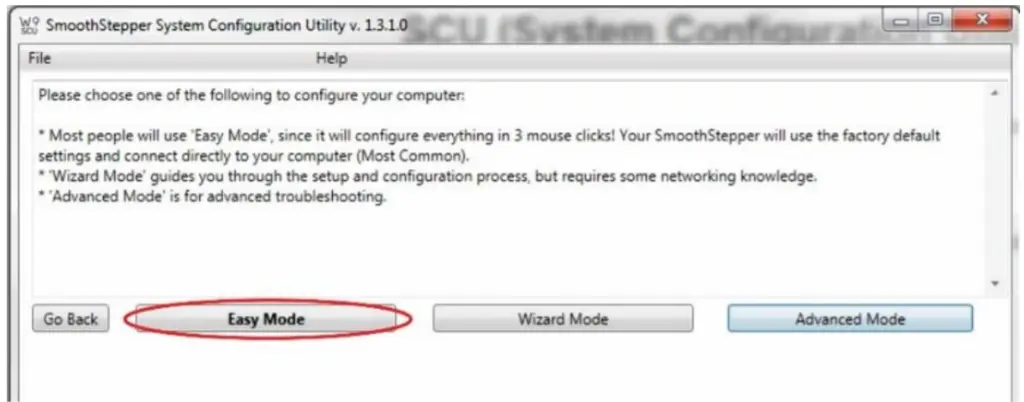
Step 3: Run the SCU Application v1.3.1 program
- Establish the connection
- Set a fixed IP on the PC’s LAN card and whitelist the device on the network:
- Configure the Connection.
- Click in Easy Mode.
- Select Smooth Stepper Network 13> click on Configure Everything.
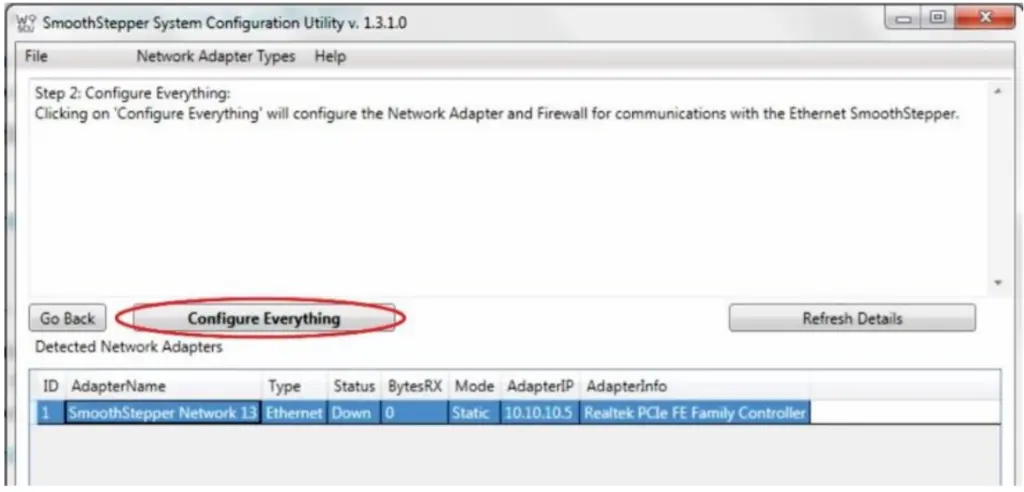
- It should appear as shown in the screenshot and close the window.

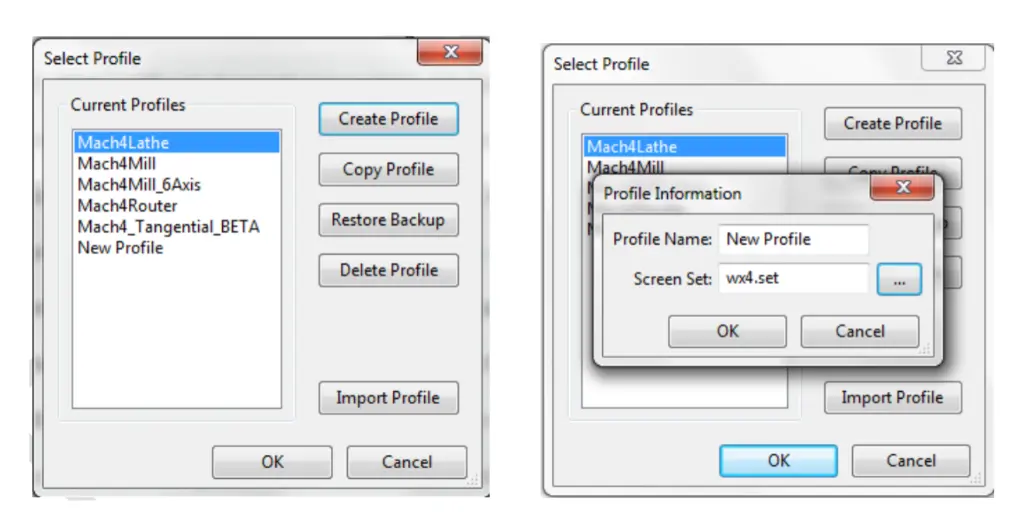
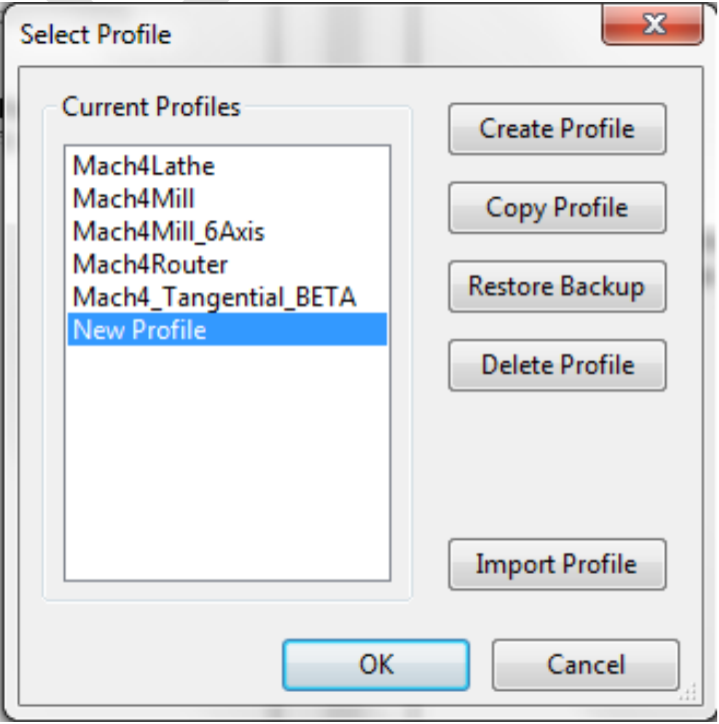
Step 4: Set a profile name and a screen set to use. Ensure that you start Mach4 with the new profile, then close it.
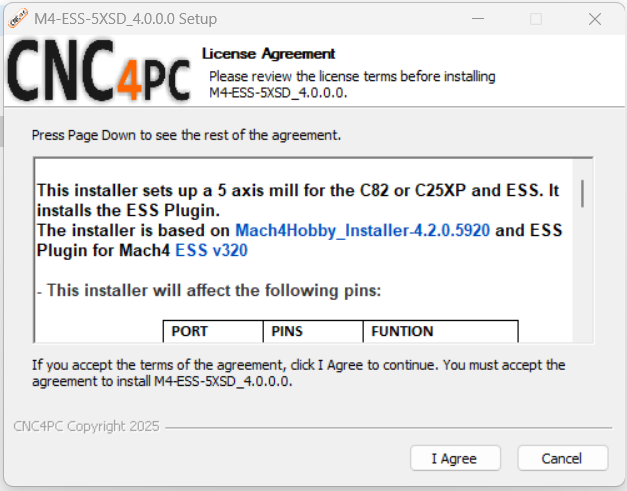
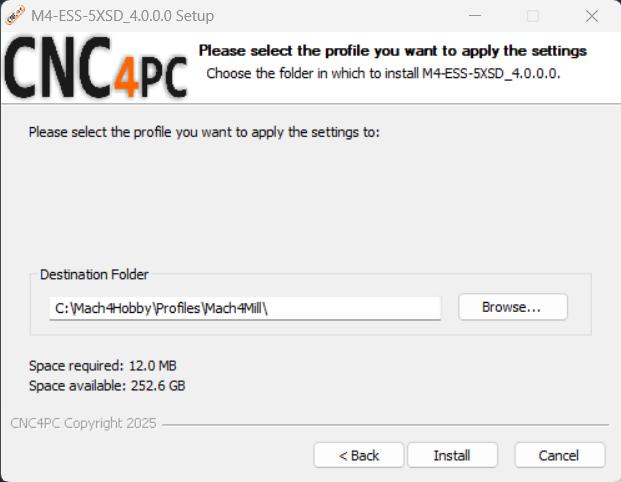
Step 5: Download the cnc4pc.com Software and run it to install the ESS Plugin and configure Mach4 and the plugin. If you prefer, you can download and copy the ESS plugin from the link at the top of this page and configure Mach4 and the plugin manually by following these screenshots.
Make sure that you run Mach4 with the profile that you plan on using, then close it before running the installer on the profile.
- Select the profile that I created> click on install
- Click on Finish.
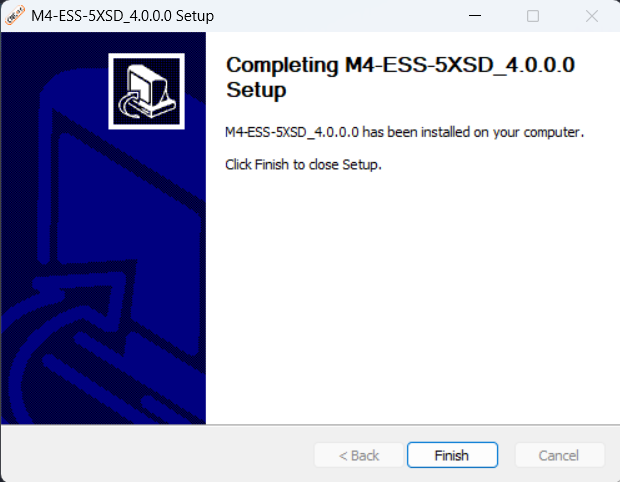
- You can now enable back on the SCHP by moving (JUMPER=ON) so it will be the control software that will enable the system.
STEP 6: Start Mach4 GUI using the profile on which you just run the installer.
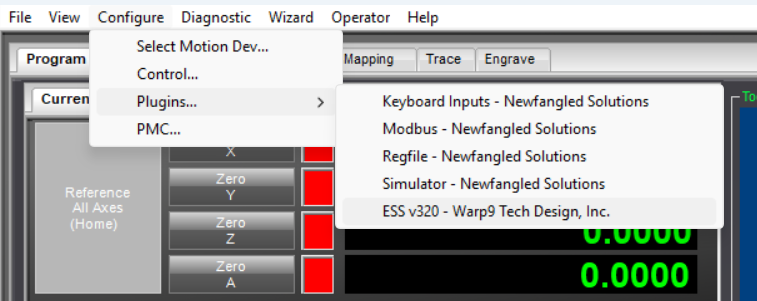
Step 7: Charge Pump Configuration.
- Configure > Plugins > ESSv320
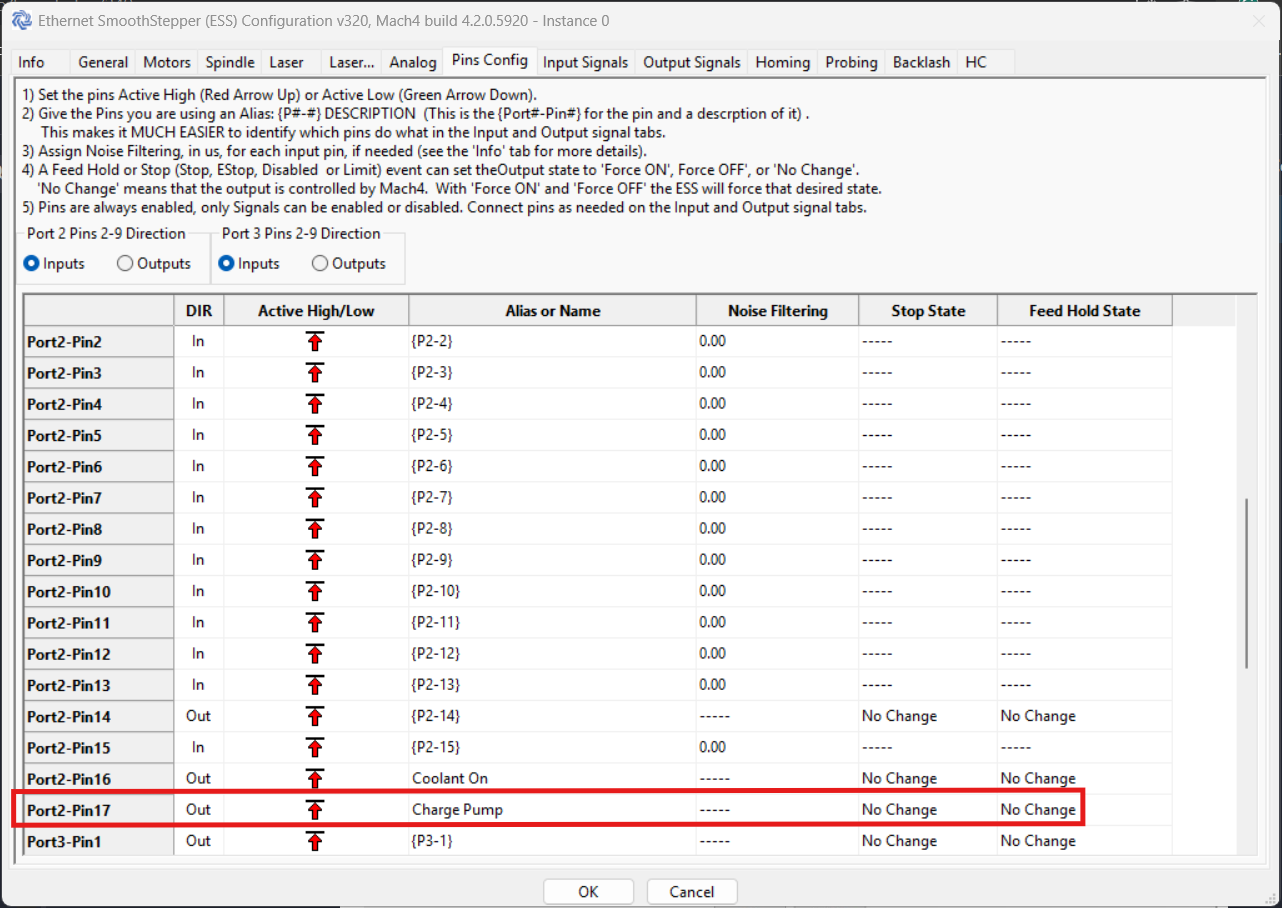
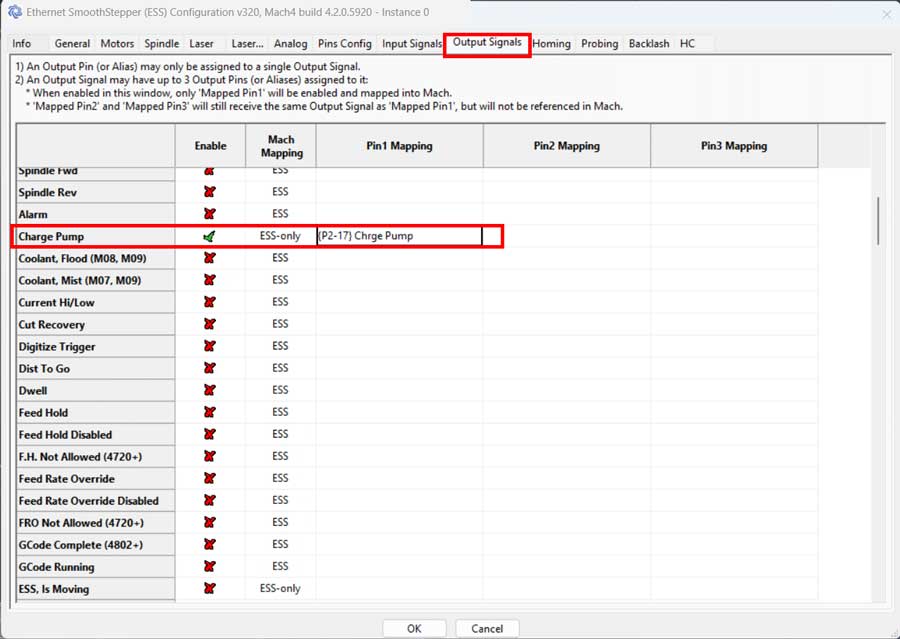
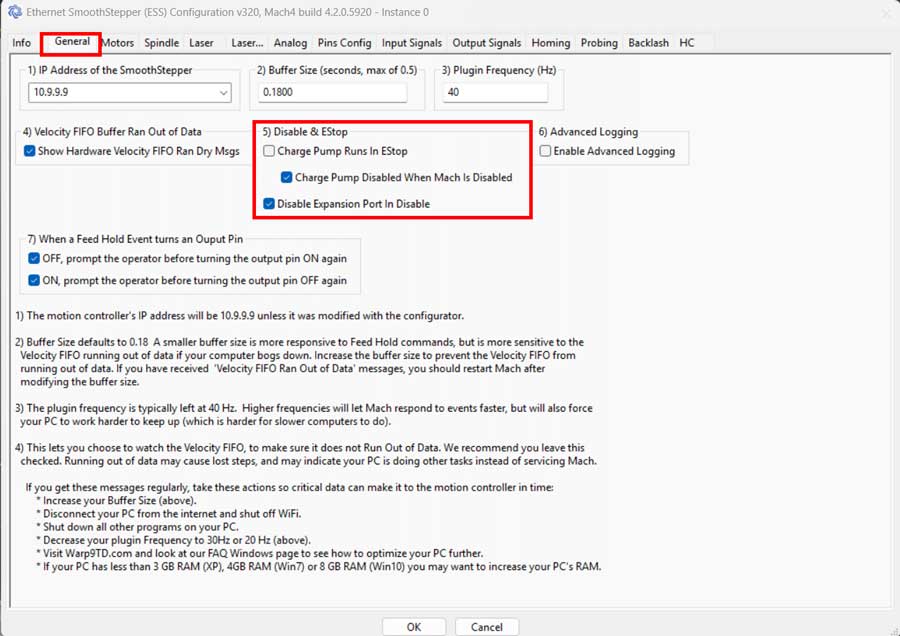
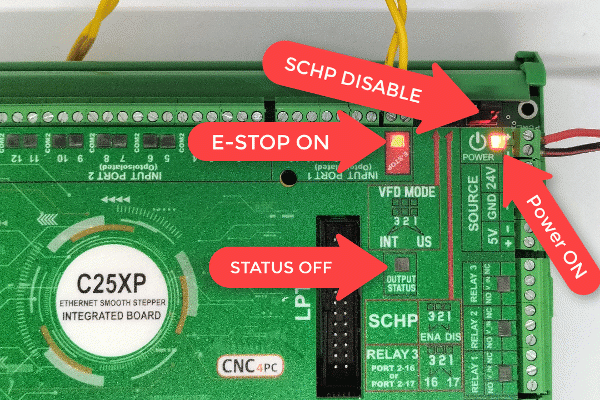
Step 8: Enable the SCHP and make Mach4 enable the C25XP.
- Close the e-stop button circuit and the board should remain disabled (No Green LED).
- Enable the SCHP by moving (JUMPER=ON) so that Mach4 can enable the system when it becomes active.