Used software: Mach3 Version 3.043.062 with Win 10 Fix.
STEP 1: Connect an E-Stop button to short the E-Stop terminals.
- This should give you a green LED while the board is powered and the e-stop is closed.
- If not, check other possible fault conditions and make sure they are not active.

STEP 2: Make sure the controller is connected to an Ethernet port on the PC and powered with LEDs ON.

STEP 3: Download the Utilityxxx for UCxxx.
- Run the to establish the connection,
- Set a fixed IP on the PC’s LAN cad and whitelist the device on the network.

- Verify that TCP/IPV4 is configured correctly for the connection used. You may need to configure it manually.

STEP 4: Run the UCX00 automatic installer for Mach3.
- Select UC300ETH motion controller
- Push-button "Start installation"

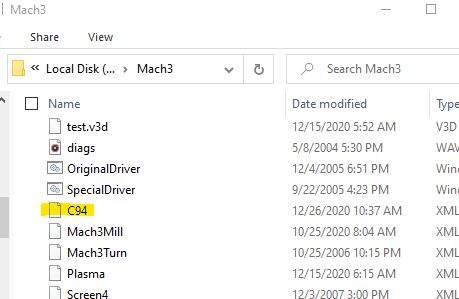
STEP 5: Download and copy the XML configuration file for Mach3. If you prefer to configure Mach3 and the Plugin Manually, you can skip this step and follow these instructions.
- Save it in the Mach3 folder. Rename it if you want to give your profile a specific name.
STEP 6: Start Mach3.
- Start Mach3 using the new profile you downloaded.
- Select the UC300ETH as the default motion device.
- You should get the green LED when you press the reset button in Mach3, and the E-Stop is closed.
- You can set the travel info for the axes and set up the max spindle speed for the spindle.
- The sample XML includes configuration for:
- Step and Direction of 4 axes.
- E-Stop.
- Safety Charge Pump.
- Homes and Limits of 4 axes, but limits are not enabled.
- Spindle Speed control, but you need to set the max spindle speed.
- Probe on pin 15 port 1.


STEP 7: Save your configuration and restart Mach3.
STEP 8: Final Test
- Test the E-Stop by opening the circuit and confirming the green LED goes off.
- You can now enable the SCHP to be back on by moving (JUMPER=ON), so the control software will enable the system.
